Yup, it’s that time again. The time to close and winterize your above ground pool. The time to prepare your pool for winter.
It happens every year. The leaves start changing color, the days start getting shorter, the air starts feeling cooler. All of a sudden, the idea of plunging in for a swim becomes less and less attractive.
But when, why, and how to do it?
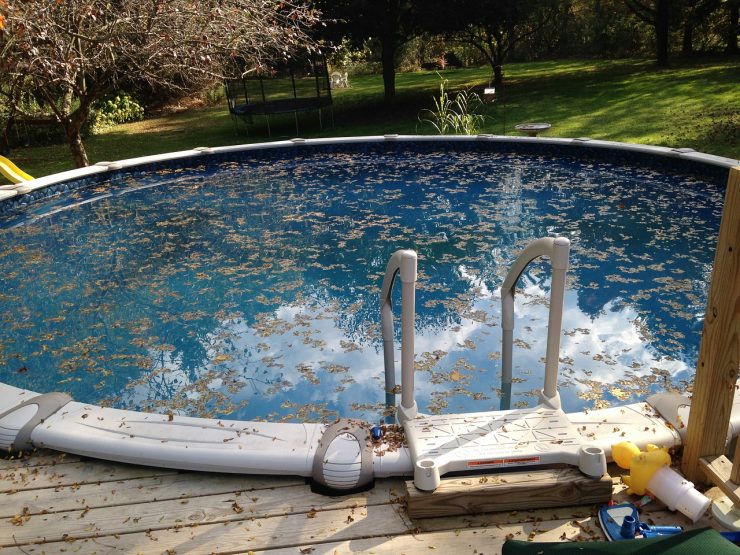
Sure, it seems like a chore, but it’s really not nearly as big of a deal as you might think. In fact, pool winterization is pretty straightforward. And if you stay focused on the positives, it’s even (just) possible to enjoy the process.
What are the positives?
- Number one, you’re protecting your investment against freeze and bacterial damage.
- Number two, you’re making life easier and less hassle-prone for yourself next year when it comes time to re-open it. And three, you’re saving money doing it yourself.
All you need to do is follow these 12 easy steps to close and winterize your above ground pool so that next year you’ll be greeted with the welcoming embrace of problem-free, sparkling water.
Another alternative to closing your pool is to drain it. If you do this, take the time to check the sand under the pool and the underlayment.
But first of all, a couple of frequently asked questions.
Article Contents
When to Close an Above Ground Pool?
In large part, this depends on the local climate where you live. If you live in a Sunbelt state or in a West Coast environment where the temperatures, though likely too cool for regular swimming, stay reasonably mild, you won’t need to worry too much about taking preventative measures against freezing.
Instead, all you’ll need to do is to clean and cover your pool and run the pool pump regularly throughout the winter months.
If, however, your pool is located somewhere with a colder winter climate you’ll want to make sure its properly protected against the elements. Not just to make opening it up easier and less hassle-free, but also to protect your investment.
Above ground pool frames and their linings can suffer serious damage from frost and algae if not properly closed and winterized.
But, the one thing you don’t want to do is close your pool too soon. Closing you above ground pool too early in the season can run the risk of triggering and encouraging the risk of pool algae.
Pool algae flourishes in warm water, so ideally you should wait until your local temperature has dropped below 65°F (18°C). The lower the temperature when you close your pool, the longer your pool water will remain clear.
Does an Above Ground Pool Freeze Solid?
This goes back to where you live. If you live somewhere that has a cold winter, then yes it can freeze over.
Why Close an Above Ground Pool?
Did you ever see The Creature from the Black Lagoon on the late-night horror channel? Well, that’s what you don’t want your above ground pool to look like when you open it up again next summer (the Black Lagoon, that is, not the Creature). Plus, you don’t want frost and freeze damage.
If you properly close and winterize your above ground pool your pool water, pool lining, and pool hardware will remain clear, clean, and safe throughout the winter months. And make opening up so much easier and worry-free.
Related Reading: How To Use A Winter Pool Air Pillow | Do You Need One?
What Materials Do I Need to Close and Above Ground Pool?
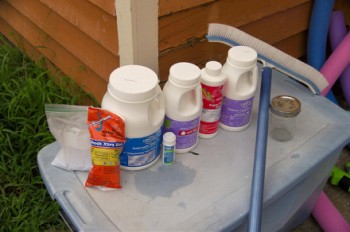
This might sound like a long list, but don’t let it faze you too much. Most of it will be stuff you already have on hand and will have used throughout the summer months in order to keep up your regular pool maintenance.
Also, depending on the climate where you live, you may or may not need all of it. Sunbelt, southern, and some western states will require different needs to northern and midwestern states. It’s all a matter of climate – and also of altitude. With that in mind, here’s the full list:
What chemicals do I need to close my above ground pool?
- Chlorine
- pH increaser
- pH decreaser
- Alkalinity increaser
- Calcium hardness increaser
- Cyanuric acid
- Metal sequestrant
- Algaecide
- Shock (ideally non-chlorine shock)
What else do I need to close my above ground pool?
- Pool brush
- Algae brush
- Leaf skimmer
- Pool vacuum
- Rubber plugs or Gizmos
- Air compressor or shop vac
- Pool antifreeze
As noted above, don’t be daunted if this sounds like a long list. A lot will depend on where you live, and it’s more than likely you won’t need all of it.
So, having got the whens and whys out of the way, let’s move on to the hows.
The following are the 12 easy steps to follow in order to close your above ground pool for the winter months, how to make your life relaxed, and how to maintain and winterize your perfect above ground pool.
Step 1. Turn Off Your Water Heater (if applicable)
If you have a gas heater with a pilot light, turn off the pilot light. Then shut off the gas supply to the heater. Disconnect any pressure switch to the tubing. Turn off any timers. Remove any drain plugs, open up the outlet and intake valves, and drain all the water from the heating system. Disconnect the power supply.
Step 2. Test the Water
At least one day before you plan to close your above ground pool, it’s vitally important that your winterizing process starts with your pool water being properly balanced.
This will protect the pool against corrosion, scale build-up, and algae that can occur during the winter months that the pool is closed.
Test the water for:
- pH
- Alkalinity
- Free chlorine
- Total chlorine
- Calcium hardness
- Cyanuric acid (aka stabilizer)
Your normal pool water testing kit that you use for regular maintenance should be more than adequate for this purpose, but you can also take a sample to your local pool company and have them test it for you.
We recommend these test strips and this liquid water testing kit.
The following table outlines the chemical ranges you should be looking for:
| pH | 7.2-7.8 |
| Alkalinity | 80-120 ppm* |
| Free Chlorine | 3 ppm |
| Total Chlorine | <0.7 ppm |
| Combined Chlorine** | 0.3-0.5 ppm |
| Calcium Hardness | 250-600 ppm |
| Cyanuric Acid | 50-60 ppm |
** Combined Chlorine = Free Chlorine minus Total Chlorine
Step 3. Balance the Water Chemistry
Adjust the levels by adding the pool chemicals until your pool water achieves the balance ranges shown in the above table. After you have balanced your pool water, leave the pool pump on to run all night.
Balancing your above ground pool water should be done at least one day before you close and winterize your pool.
Step 4. Remove All Pool Accessories Including Ladders, Stairs, Handrails, etc
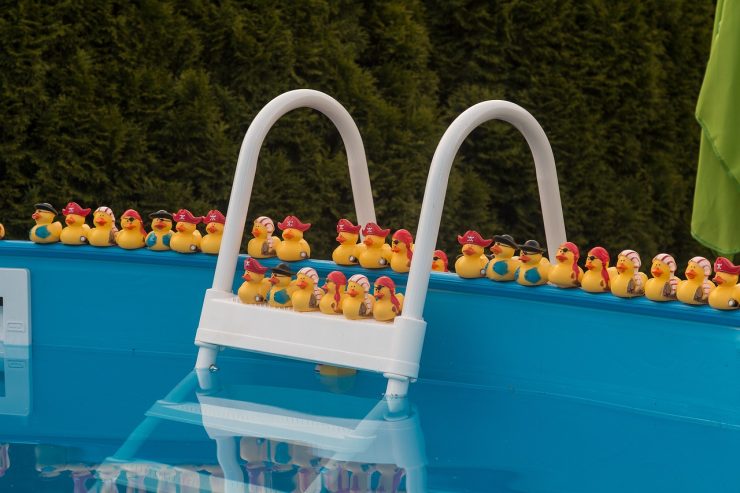
Ladders, stairs, and handrails should be removed and stored in a dry environment.
Slides need not be removed as long as they do not get in the way of your pool cover’s ability to close your pool completely.
Step 5. Clean the Pool Thoroughly
Above ground pools must be cleaned before winterizing. So, skim, brush, and vacuum the pool thoroughly. In that order.
When brushing, remember that the crucial thing is to remove as much dirt and organic material as possible – both to prevent staining from sediment as well as to prevent any impending algae spores.
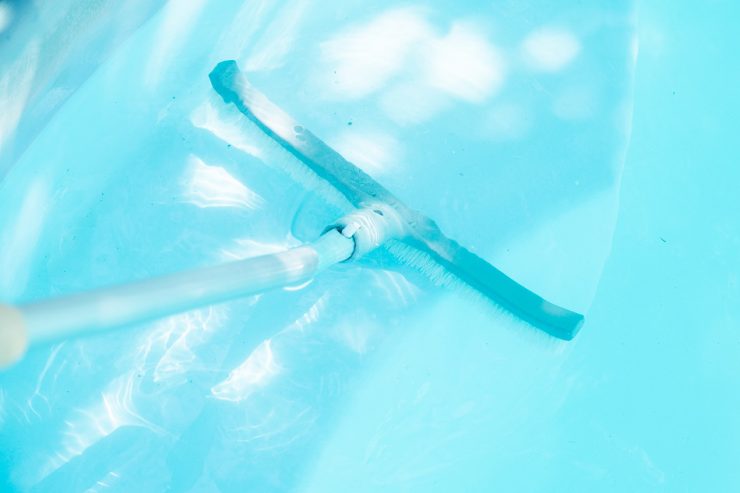
So be sure to brush thoroughly the pool floor and sides, including any angles where the above ground pool walls meet.
In order for you to vacuum latent algae spores out after you’ve brushed, you may need to use a specialized algae brush.
We recommend you use a soft pool brush when closing your above ground pool. This will prevent the lining getting damaged. Here’s one we’d recommend:
Algae brush for above ground pools
After you’ve skimmed, brushed, and vacuumed your above ground pool. Skim it one more time.
Step 6. Add Winterizing Chemicals
You have two choices:
1. Use a Pool Closing Chemical Kit or;
2. Individually Add Pool Closing Chemicals
Choice 1. Using a Winter Pool Closing Chemical Kit
When your above ground pool has been properly tested, balanced, and cleaned, it’s time to add a winterizing chemical kit – also known as a non-chlorine shock or a chlorine-free pool closing kit.
This is the easiest way to do it.
These are pre-packaged chemical kits to suit the size of your pool, and include everything you need – pool shock, stain and scale preventer, a long-lasting algaecide, and a slow-release float of oxidizing chemicals – all in one easy dose. Just follow the directions on the package label and you’re good to go.
NOTE: Some winterizing chemical product packets can just be sprinkled in the deep end of the pool. Others require you to run the pump for at least an hour. So make sure you read the instructions.
Here is a pool closing kit we recommend:
Choice 2. Add Winter Pool Closing Chemicals Individually
On the other hand, if you’d prefer to pull on your white lab coat and use a chlorine shock and the other chemicals that go with it, here are the alternative steps you need to take.
1.) Add chlorine shock at least 5 days before you plan to close and cover your above ground pool.
Use at least 2 lbs of chlorine for every 10,000 gallons of water, or else follow the chlorine package instructions.
NOTE: Wait until the sun has gone down before chlorine shocking your pool. Direct sunlight will dissipate and reduce the effectiveness of chlorine too quickly, and thereby limit its ability to do its job.
2.) Add Algaecide. Wait until the chlorine level in your above ground pool has lowered itself to less than 3 ppm, and then add the algaecide.
How much algaecide should you add to close pool? Once again, follow the algaecide package instructions, but if your above ground pool has a deck and a wire mesh rather than a solid pool cover, it’s not a bad idea to add twice the recommended dosage of algaecide.
3.) Add a metal sequestrant – especially if your above ground pool water has a high metal level, and especially if it is drawn from a well rather than the main city water supply.
This will ensure that the metals in suspension in the water do not settle to the bottom of your pool and stain the vinyl liner, but, instead, remain in suspension.
4.) Add a winter pill. Winter pills contain slow-release water clarifiers and sanitizers that will help keep your pool water clear and cloud free during the period when your pool is closed and the pool pump is turned off.
5.) Add pool enzymes to eliminate organic matter contaminants that may have been left over after your cleaning.
Do You Need to Add Antifreeze?
If you live in a climate that gets sub-zero winters and you don’t blow out the pipes of your pool. You will need to add antifreeze. Make sure you use the correct antifreeze, though. We have an article on this: Is RV Antifreeze OK for a Swimming Pool? (Answered!)
Step 7. Lower the Pool Water & Winterize Skimmer
It’s essential you protect your skimmer from cracking during winter. But do you actually need to drain the pool water to winterize your pool?
No you don’t need to drain the water level if you use a winter skimmer cover plate to protect your skimmer during the winter.
A winter skimmer cover blocks pool water from entering the skimmer and therefore protects it from cracking when the water freezes.
You can find Winter Pool Skimmer Covers here.
We have more info on how far to drain your pool in this article here:
Should You Drain Pool Below Skimmer or Return Jets?
How far to drain your above ground pool?
If you don’t use a winter skimmer cover plate, then you’ll need to drain your above ground pool water level. How much water to drain? Drain the water level of your pool until it is a couple of inches below the skimmer and the returns (i.e. where the water jets into the pool).
How to Use Winter Gizmo
A gizmo is essentially a piece of hollow plastic tube that screws into the bottom of your skimmer box. When the water freezes and expands, the gizmo compresses. This prevents the skimmer from cracking.
Simply screw it into the bottom of your skimmer. If you’re using antifreeze (covered later in this article), add the antifreeze first.
You can get a pool gizmo here.
NOTE: When winterizing you above ground pool, never drain it completely. Doing so can cause your vinyl liner to dry out and crack, or even cause your pool walls to collapse.
Step 8. Prepare Your Pump(s) and Filter
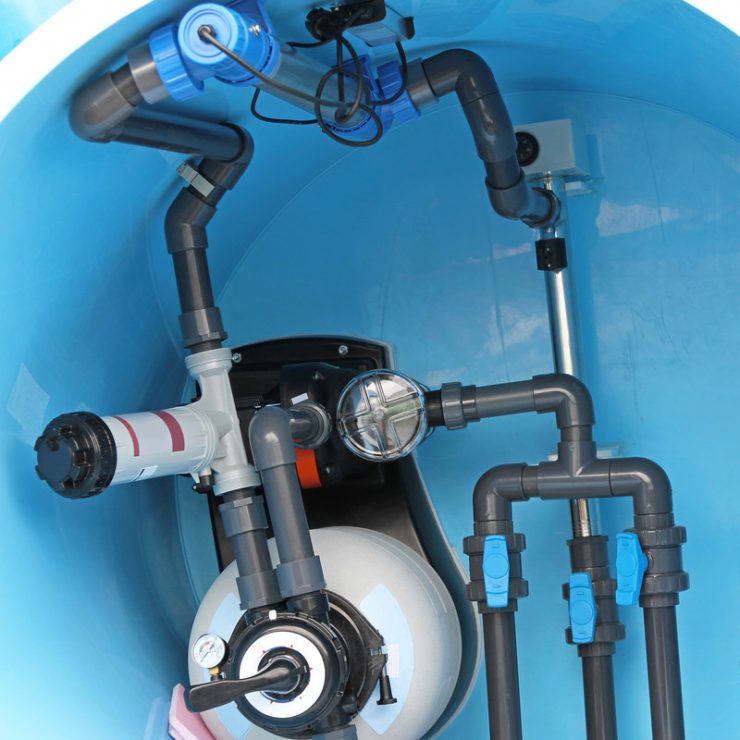
How to Winterize Pool Filter
Winterizing your pool filter is necessary to protect it from freezing and potential damage. Here’s how.
Winterizing a Sand Filter
If you have a sand filter, set the valve to Winterize, remove the drain plug, and allow the filter to drain completely.
If it does not have a Winterize setting, backwash for 2-3 minutes until the water runs clear. After you finish backwashing, turn the valve back to filter.
Winterizing a DE Filter
Drain it then rinse off the grids with a hose. Make sure you leave the valves open.
Winterizing a Cartridge Filter
Simply drain it then rinse off the grids with a hose.
How to Winterize Pool Pump
Now it’s time to drain your pump(s) of any residual water.
You can drain your pump by opening the strainer cover then removing the drain plug(s). This varies from model to model. Now run your pump for a couple of seconds, but no more, to remove the water from the impeller. Do not turn on for longer than this though or you could potentially burn out the seals.
If your above ground pool is plumbed in with flexible, detachable pool filter lines, simply remove them and store them in a dry environment for the winter by following the specific manufacturers’ instructions for your above ground pool.
Step 9. If Your Above Ground Pool Is Hard-Plumbed, Blow out the Pool Lines
Although most above ground pools are not hard-plumbed, some are; and if yours is one of these then you’ll want to blow out your pool lines.
Unless, that is, you live in a relatively warm climate zone where it rarely if ever drops to freezing or below.
Here’s how to blow out your pool lines so as to remove every drop of water in the lines, filter, and pumps that might otherwise cause you expensive freeze damage repair bills next Spring.
In order to blow out your hard-plumbed pool lines, you will want to use either a small air compressor set to a low psi, or else a high-volume shop vac or vacuum/blower.
If you don’t have an air compressor, here’s one we’d recommend:
1.) First of all, scoop any remaining water out of your skimmer that has been left over after lowering your pool. You want to make sure the skimmers are almost completely emptied.
2.) Open the pump valves.
3.) Set the multiport to “recirculate”.
4.) Open the drain plug.
5.) Connect the air compressor/blower/shop vac to the pump. (Note: a compressor may need an adaptor.)
6.) Blow air through the system. You will start to see bubbles of air coming out of the return lines and the skimmers.
7.) Insert rubber pool plugs into the bottom of the skimmer.
8.) Insert rubber pool plugs into the return line.
9.) Turn your pump valve to the “main drain” setting.
10.) After a minute or two you should see air bubbles escaping from the main drain in your swimming pool.
11.) Turn the pump valve back to the “skimmer” setting, and shut off your air compressor/blower/shop vac.
12.) Just in case a valve leaks during the winter, put a final rubber pool plug inside the pump itself.
If all this sounds too complicated (which it actually isn’t), you can always get a professional pool company to blow out your lines for you.
Step 10. Should I Add Antifreeze?
If you live in a mild climate or, if not, you have hard-plumbed lines and have thoroughly blown out your lines, antifreeze shouldn’t be required. But if you’re still concerned and live in a particularly cold climate, now is a good time to add it. But, before you do, please bear in mind the following:
Pool antifreeze is absolutely NOT the same as the antifreeze you put in your car. It is specifically designed for swimming pools. Pool antifreeze, unlike car antifreeze, is non-toxic. But, that having been said, don’t gargle with it!
Recommended pool antifreeze:
Antifreeze reacts dangerously when in direct contact with chlorine, so DO NOT add it at the same time as you add chlorine. Add it right towards the end of the pool closing process.
How much antifreeze is needed to close a pool?
Generally, most manufacturers’ instructions suggest using approximately one gallon of antifreeze for every 10 feet of pool line. That, however, is usually based upon the assumption that the pool lines are full of water and have not been blown out.
So, if you have blown out your lines, half a gallon should be enough.
How to add the antifreeze to my pool?
Just pour it directly into the skimmer. Now plug the skimmer (or install a gizmo) at the bottom to prevent rainwater from filling up the lines and skimmer box.
Step 11. Inflate and Install a Pool Air Pillow
Also known as an ice compensator, a pool air pillow compensates for the pressure of ice both on top of the pool cover and pool water ice that would otherwise expand against, and potentially cause damage to, the walls of the pool.
If you live in a colder climate where winter freezes are common, a pool air pillow is a good idea.
When you inflate your pool air pillow, only inflate it by around 60%. The idea is that the air pillow needs to be able to expand without popping when the pool water freezes and compresses against it.
Tip: To make sure you pool air pillow stays the middle of your pool, use a thin rope to secure it to the walls on either side of the pool. Some pillows come with 4-way grommets so you can secure them to 4 corners of your above ground pool.
Here’s an Air Pillow for above ground pools we recommend.
Step 12. Cover Your Above Ground Pool
Place the winter pool cover over your pool and secure it in place by threading the cable through the grommets, loops, and/or winter cover clips. Use the winch that came with the cover to tighten it into place.
If your above ground pool has a walk-around deck, place water bags on top of the cover and around the edge of the pool.
Only fill water bag weights approximately ¾ full – if you over-fill them, they may split apart as the water inside freezes and expands.
NOTE: Never use concrete blocks, bricks, stones etc. to weigh down your cover. They can damage your pool cover or, if they fall into your pool, the vinyl liner, floor, and walls of your above ground pool too.
Here are some above ground pool cover options if you don’t already have a winter pool cover.
One Last Suggestion
Put a pool cover pump on your winter pool cover to drain away excess water. Too much weight on top of your pool cover can cause it to rip or else collapse into the pool – bringing with it any water bags that may have been helping to weigh it in place.
Here’s a couple of pool cover pumps we’d recommend
Conclusion
There. Closing an above ground pool wasn’t so hard was it? Your pool is now safe, secure, and snuggled up for the winter. And you can put your feel up until next summer secure in the knowledge that your pool will be waiting for you with crystal clear, and not Black Lagoon, waters.
Recommended Products
Algae brush for above ground pools
Air Pillow for Above Ground Pool
Above Ground Pool Winter Covers
Related Reading:
How Long Does It Take to Heat a Hot Tub? (and Tips for Faster Heating)
How To Use A Winter Pool Air Pillow | Do You Need One?
How to Maintain an Above-Ground Pool in Winter

