The days are getting shorter, and cooler. And with that comes the dreaded annual question: why, when, and how do I winterize my inground pool? Sure, you can hire a professional company to do it for you, but that costs money.
Besides that, isn’t self-sufficiency – at least when it comes to domestic entertainment – a large part of the reason you decided to own a pool in the first place?
Yes, of course closing your inground pool and preparing it for winter sounds like a hassle. But it’s really no biggy. It’s simple, requires only a bit of time, a little effort, and merely following these 11 easy stages. Plus, you’ll be amazed how self-satisfied you feel when it’s all done.
So, stick with us while we walk you painlessly through the uncomplicated process, and next season you’ll be able to open up your pool to clear, sparkling, and wonderfully welcoming water.
First of all, though, let’s address a couple of common questions that many people ask us.

Article Contents
Why do I Need to Winterize an Inground Pool?
Remember that scene in Star Wars, The Last Jedi, when Luke Skywalker crashes his X-Wing fighter into a yucky green swamp before meeting Yoda? Well, properly closing and winterizing your inground pool will ensure that next season, when you come to open it up again, you’re not re-enacting a George Lucas moment.
It’ll mean your pool water and pool hardware stays clean, safe, and ready for you to get back to swimming. What’s more, it will protect your investment from not just the elements but also from a potentially large repair bill.
When to Close Inground Pool?
A lot depends on where you live as to when you’ll close your inground pool. The one thing you want to avoid is closing too soon, and thereby potentially encouraging the growth of algae. Algae flourishes in warm water, so ideally you should wait to close an inground pool until the local temperatures drop below 65°F (18°C).
Closing your inground pool at lower temperatures means your pool water will remain clearer for longer.
Of course, if you live in a Sunbelt state or West Coast location where temperatures stay reasonably warm (though possibly too cool for comfortable pool use), you don’t need to worry too much about prevention measures against freezing. All you need to do is clean and cover your pool, and run the pool pump throughout the winter.
What Materials & Chemicals Do I Need to Close an Inground Pool?
Although the following list is comprehensive, what you’ll actually need to close your pool for the winter will depend on the climate where you live.
Northern and midwestern states will call for different needs to Sun Belt, southern states, and west coast states. The altitude where you live will also make a difference. With that in mind, here’s the full list:
What chemicals do I need to close my inground pool?
- Chlorine
- pH increaser
- pH decreaser
- Alkalinity increaser
- Calcium hardness increaser
- Cyanuric acid
- Metal sequestrant
- Algaecide
- Shock (preferably non-chlorine shock)
What else do I need to close my inground pool?
- Pool brush
- Algae brush
- Pool vacuum
- Winterizing rubber plugs
- Air compressor or shop vac
Don’t worry if this sounds like a long list. Most of it will be stuff you already have and have used through the summer to maintain your pool. Also, some of the other stuff you may or may not need depending on where you live.
So, having got the preliminaries out of the way, here’s how to winterize a pool.
Step 1. Remove Ladders and All Pool Accessories
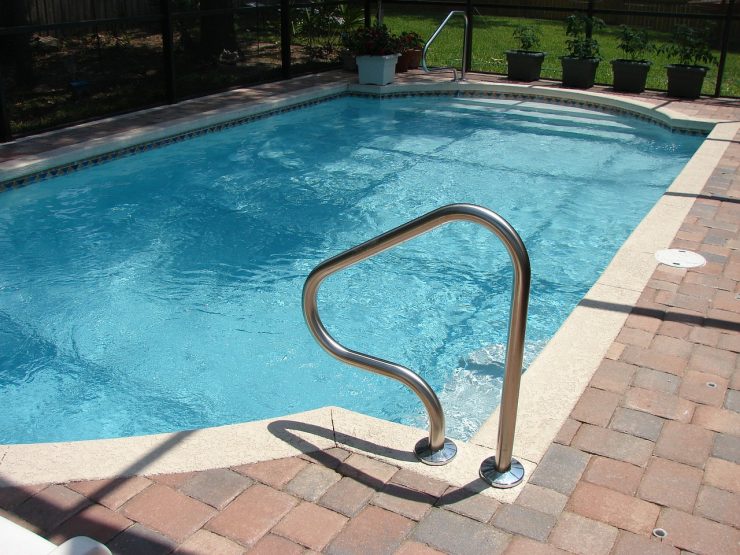
Pool accessories include any handrails, slides, skimmer baskets etc. Metal ladders and handrails can usually be hoisted into a vertical, or near vertical, angle. Plastic ladders and handrails, together with skimmer baskets, should ideally be removed and stored in a dry environment.
Slides, whether metal or plastic need not be removed as long as they don’t affect the ability of your pool cover to close your pool completely.
Step 2. Thoroughly Clean the Pool

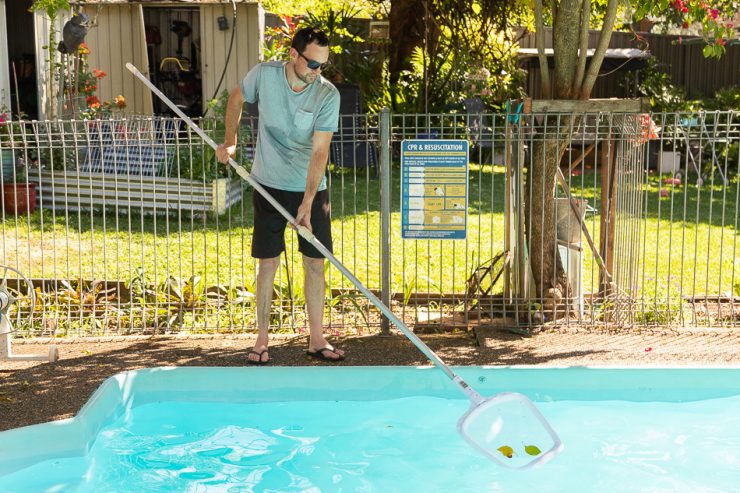
Skim, brush, and vacuum the pool thoroughly – in that order.
The important thing is to remove as much organic material as humanly possible. So, make sure when you’re brushing to scrub the pool floor and walls – including the corners and the angles where the pool walls meet. The reason for this is that you want to disturb as much sediment as possible, as well as any impending algae spores.
You may need to use an algae brush so you can vacuum them out after you’ve finished brushing. The type of algae brush you’ll need will depend on whether you have a solid (tile or concrete) or vinyl lined pool.
Once you’ve skimmed, brushed, and vacuumed, skim one more time.
Step 3. Turn Off Your Water Heater (if applicable)
If you have a gas heater with a pilot light, turn the pilot light off. Shut off the gas supply to the heater. If you have a pressure switch, disconnect it and drain the tubing. Remove the drain plugs and open the intake and outlet valves to drain all water from the heating system. Turn off any timers. Disconnect the power.
Step 4. Test the Water
Before you add any chemicals or go any further, it’s important that your winterizing process starts off with your pool water being properly balanced in order to protect against scale build-up, corrosion, and algae during the months the pool is closed.
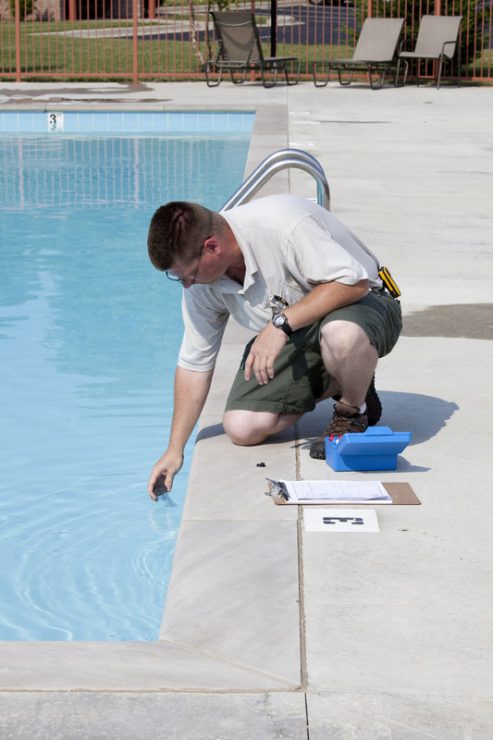
So, test the water for pH, Alkalinity, Free Chlorine, Total Chlorine, Combined Chlorine, Calcium Hardness, and Cyanuric Acid. Your regular pool testing kit should be more than adequate, but if you want to be 100% confident you can always take a sample to your local pool company for testing.
In a perfect world, here are the numbers/ranges you should be looking for:
| pH | 7.2-7.8 |
| Alkalinity | 80-120 ppm* |
| Free Chlorine | 3.0 ppm |
| Total Chlorine | <0.7 ppm |
| Combined Chlorine** | 0.3-0.5 ppm |
| Calcium Hardness | 250-600 ppm |
| Cyanuric Acid | 30-60 ppm |
** Combined Chlorine = Free Chlorine minus Total Chlorine

Step 5. Balance the Water Chemistry
Add the pool chemicals until you achieve the balance ranges shown in the table above. It’s more than likely you already have all, or at least most of, the chemicals you need from your regular pool maintenance supply.
NOTE: Water balancing should be done at least the day before you plan to close and winterize your pool. After you have balanced the pool, leave your pump on to run all night.
Step 6. Add Winterizing Chemicals & Shock Your Pool
Chlorine shock your pool at least 5 days before you plan to close and cover it, and before you add the winterizing dose of algaecide. High chlorine levels effectively kill algaecide, so you need to wait until the chlorine level in your pool drops back to below 3 ppm. For the chlorine shock, use at least 2 lbs per 10,000 gallons or follow the package instructions.
Note: it’s always best to shock your pool after the sun has gone down. That way, the sunlight will not dissipate the chlorine too quickly and before it is able to get to work and do its job.
Once the chlorine level has dropped to less than 3 ppm, you can proceed to the next step.
You have two choices:
a). Use a Winterizing Chemical Kit
Once your pool water is properly balanced, the easiest approach is buy a winterizing pool closing kit. These are usually pre-packaged to the size of your pool, and contain everything you need in one easy dose.
These include a scale and stain preventer, a powerful and long-lasting algaecide, and a floater that contains slow-release oxidizing chemicals. They’re also a lot less stress than simply closing your pool up after balancing the water chemistry and hoping for the best.
If, on the other hand, you do prefer to add the chemicals yourself, proceed to b).
b). Add Winterizing Chemicals
Again, follow the package instructions, but if you have a mesh rather than a solid pool cover add twice the recommended dosage.
Here’s a list of the closing pool chemicals needed:
- Algaecide
- Metal sequestrant
- Winter pill (sanitizer and clarifier)
- Pool enzymes
- Antifreeze (optional)
Add an Algaecide. This will help to prevent any algae growing and make it faster to open your pool for the summer. How much algaecide is needed to close a pool? Follow the manufacturer’s instructions – if you’re using a mesh pool cover, add double.
Add a metal sequestrant if your pool water has a high metal level, or especially if your pool water is drawn from a well. The sequestrant will help keep the metals in suspension so they don’t settle in your pool and create stains.
Add a Winter Pill. These contain water sanitizers and clarifiers that provide slow-release during a time when the pool is closed and the water pump is turned off.
Add pool enzymes. These will help to eliminate contaminants by organic matter.
Step 7. Lower the Water Level
How much water to drain depends on where you live.
If you live in a Sunbelt state or else enjoy a dry and warm climate, you can omit this step. If not, then you will want to lower your pool water level at the end of the season in order to prevent freeze damage.
How much should you drain an inground pool for the winter?
If you have a solid pool cover, lower the water level to 3-4 inches below the level of the skimmer line. If you have a mesh pool cover, lower the water level to around 16-18 inches below the level of the skimmer line.
We have a full article dedicated to the water level: How Far Should I Drain Pool for Winter Closing?
Step 8. What About Adding Antifreeze?
If you plan to blow out your lines (covered later in the article), antifreeze shouldn’t be necessary. But, if you live in a particularly cold climate and are still concerned, now is the time to add it. But there are a couple of important things to bear in mind before you do:
Pool antifreeze is specifically designed for swimming pools. It is ABSOLUTELY NOT the same stuff as you put in your car: car antifreeze is toxic, pool antifreeze isn’t (but, all the same, don’t drink it!).
Antifreeze reacts dangerously when in direct contact with chlorine, so DO NOT add it at the same time as you add chlorine. Add it right at the end of the pool closing process.
How much antifreeze to close my pool?
Most manufacturers instructions (which should be followed) suggest adding around a gallon of antifreeze per 10 feet of line. However, that assumes the lines have not been blown out, and are still full of water. If you’ve successfully blown out your lines, you should need only a fraction of this amount.
How to add the antifreeze to my pool?
Pour it in directly into the skimmers. If you’ve already plugged them, remove the plugs before pouring, and replace them afterwards.
Step 9. Backwash, Clean, and Drain the Pool Filter Pump
If you have a sand filter or Diatomaceous Earth (D.E.) filter you will need to backwash them for 2-3 minutes until the water runs clear so as to remove all residual bacteria and debris before you close the pump down for the winter.
Be sure to turn the valve back to filter after you finish backwashing.
If you have a cartridge filter, remove and wash it thoroughly using muriatic acid or the manufacturer’s recommended pool filter cleaner. Then rinse it, dry it, and store it.
Drain all the water out of the pump and filter. Here’s how to drain your pool filter: How to Drain the Water from a Sand Filter
Step 10. Blow Out the Pool Lines
If your pool is in a warmer climate which rarely if ever gets to freezing or below, you can skip this step and/or use pool antifreeze (see below).
In colder climates, though, you should aim to blow out your lines so as to remove every drop of water that might be lurking in the lines, in the filters, or in the pump so as to avoid cracks or fractures occurring from freezing.
How to blow out inground pool lines?
The best way is to use either a small air compressor set to a low psi, or else a high-volume vacuum/blower or a shop vac.
- First of all, scoop any remaining water out of your skimmer that has been left over after lowering your pool. You want to make sure the skimmer is almost completely emptied.
- Open the pump valves.
- Set the multiport to “recirculate”.
- Open the drain plug.
- Connect the air compressor/blower/shop vac to the pump. (Note: a compressor may need an adaptor.)
- Blow air through the system. You will start to see bubbles of air coming out of the return lines and the skimmer.
- Insert winterizing rubber pool plugs into the bottom of the skimmer.
- Insert rubber pool plugs into each of the return lines.
- Turn your pump valve to the “main drain” setting.
- After a minute or two you should see air bubbles escaping from the main drain in your swimming pool.
- Turn the pump valve back to the “skimmer” setting, and shut off your air compressor/blower/shop vac.
- Just in case a valve leaks during the winter, put a final rubber pool plug inside the pump itself.
NOTE: If all this sounds too complicated (which it actually isn’t), you can always get a professional pool company to blow out your lines for you.
WARNING: Use caution during this step as you can damage the pipes if you use too much pressure.
Step 11. Cover Your Pool

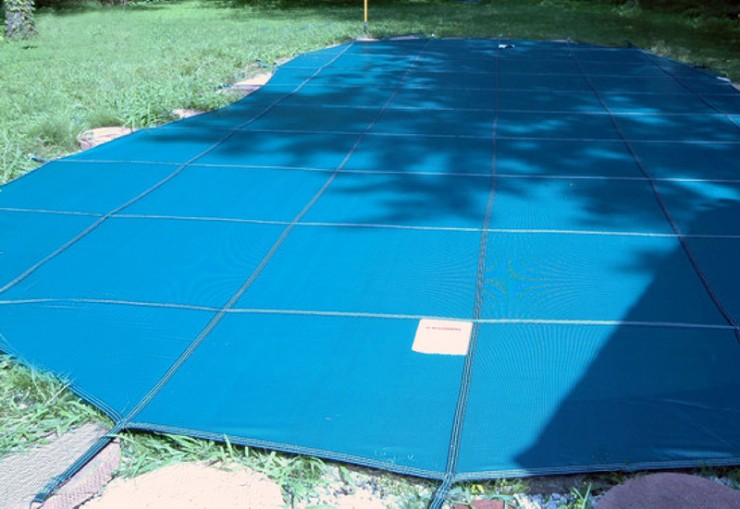
If you have a solid pool cover, this step is more than likely to be more than a one-person job so be sure to have your helper (spouse/partner/friend) set up and ready to go when you’re ready to close. You don’t want to leave your pool uncovered for any longer than absolutely necessary.
Also, inspect your pool cover to make sure there aren’t any holes or tears that require patching. If so, patch them. Also, make sure the pool cover is clean, there’s no point in going to all the effort to clean your pool thoroughly if all you’re going to do is close it with a dirty pool cover that introduces all sorts of contaminants into your pool water.
If your pool cover is the kind that requires water bags to hold it in place, make sure you only fill the bags to about 75% of their capacity – you need to allow for the water to expand in the event of freezing.
Finally, give your pool water one last skim to ensure it is as clean as possible. Pull the cover over the pool and secure the cover in place.
Conclusion
There. That’s it. You’re all done. Piece of cake. Now all you have to do is sit back, put your feet up, and relax for the winter comfortably in the knowledge that when you open your pool next season you’ll be greeted by clear, clean swimming water rather than Luke Skywalker’s swamp or the home habitat of the Creature from the Black Lagoon.
Related Reading:
Leaf and Debris Pool Covers – Are They Right For You?
How To Shock A Swimming Pool For Beginners (In 8 Easy Steps)

