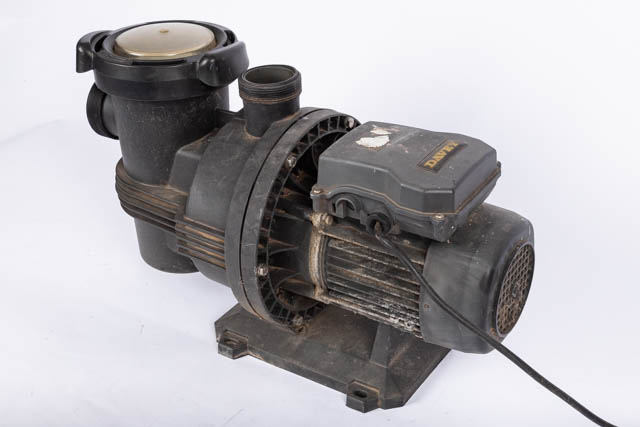
Chances are, you want to know how to remove and replace the shaft seal in your pool pump, because you have a leak. The shaft seal, also known as a mechanical seal is one of the most common causes of water leaking from pool pumps.
I recently replaced a shaft seal. So I decided to create a step-by-step instruction guide on how you can do the same.
Although your pump may not look the same as the one I took apart, this guide will work for a variety of pumps. Including Pentair, Sta-Rite, Hayward, Polaris, Onga, Jandy, and Aquaflo.
Article Contents
Signs of a Faulty Shaft Seal
You’ve got water leaking out of your pump, but how do you know that it is the shaft seal? The shaft seal (mechanical seal) is inside the pump, so you can’t see it.
Here are some signs to look out for:
- Corrosion or white coating on the metal parts of the motor
- Water dripping from the bottom of the pump near the motor
- Water dripping out of the motor vents
You also want to confirm that the water isn’t leaking from another part of the pump. We have an entire article on diagnosing a faulty shaft seal. So if you’re not sure, check out the article here.
Which Shaft Seal Do You Need?
It’s important that you choose the correct type of shaft seal when you replace it. Otherwise, your pump will continue to leak, even after replacing the seal.
Keep in mind there are also generic shaft seals that work too. As long as they are the right size and the same as the original, they should work fine.
So how do you know which seal to order?
Just grab the make and model of your pool pump. The brand alone won’t be enough. Each manufacturer makes dozens of different pump types. And all with different shaft seals.
If you don’t have the instruction manual, you might find a sticker or part number stamped on the side of the pump housing. Failing this, you may need to dismantle your pump first.
One thing to note is that the motor model is different from the pump model. You won’t be able to use the motor model number, you need the pump. The pump model number will be on the pump and not always on the motor.
How to Replace a Pool Pump Shaft Seal
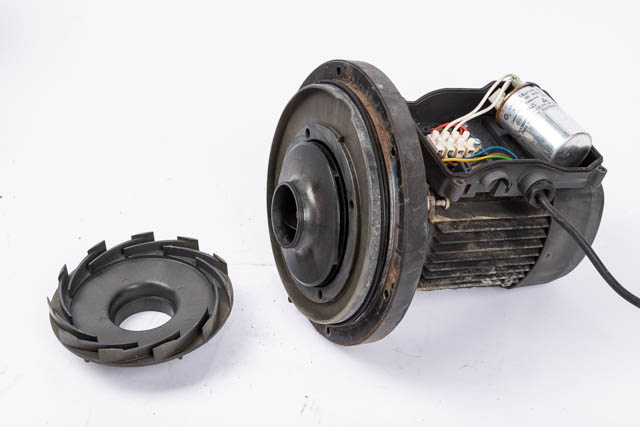
Before we get started, here’s a quick pic showing the location of the shaft seal. It’s inside the pump housing, behind the diffuser, and behind the impeller.
In short, to replace it, you’ll need to open the pump housing, remove the diffuser and then remove the impeller.

Step 1) Remove the Pool Pump
To keep this article concise, I’ll give a very quick guide on removing the pump.
Start by switching off the pump at the breaker. Then unplug it or if you can’t unplug it, remove the pump power cable.
To do this, open up the terminal housing of the pump and loosen the wire terminals so you can pull the cord out.
Important: before touching or loosening the terminals, use a multimeter or vault meter to ensure there is no power going to the pump. It could kill you if there is power still there.
If you have had to open the terminal housing, it’s also a good idea to discharge the capacitor, as it can hold voltage for hours or days. Do this by putting a screwdriver across the terminals (don’t touch the metal part of the screwdriver though – you’ll know all about it if you do!).
The next step is to release the pressure relief valve on the filter. Then take the lid off the pump. Loosen the unions of the inlet and outlet sides of the pump. You should now be able to remove the pump and drain the water out of it.
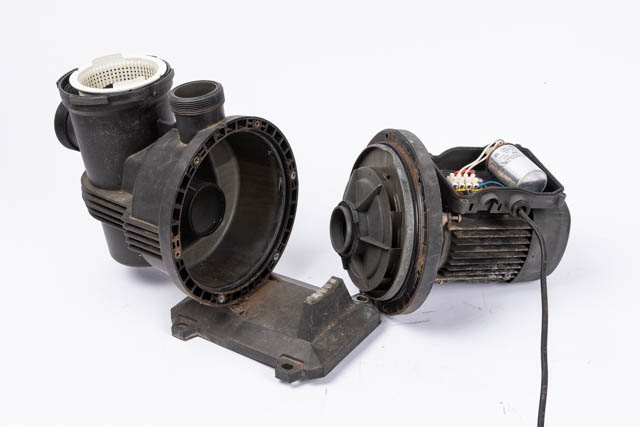
Step 2) Remove the Motor from the Pump Housing
There are essentially two parts to the pump, the wet side (usually black plastic part) and the motor side (metal cylinder). There is a seam that holds these two together. It’s usually secured by either bolts/screws or a metal band.
Undo these and separate the two parts. You may need to gently pry the two parts apart with a large screwdriver. Be careful not to damage the housing, though.
You’ll end up with something like what’s shown in the image below.
Step 3) Remove the Diffuser
Now that you have the pump housing separated from the motor, remove the diffuser. It usually just pulls off the motor side of the pump. When the diffuser is off, you’ll be able to see and access the impeller.
The diffuser may stay stuck in the pump housing side too. That is, it may not be attached to the motor side. That’s OK, just pull it out.
Note: If you can’t pull the diffuser off, check for a screw holding it in place.
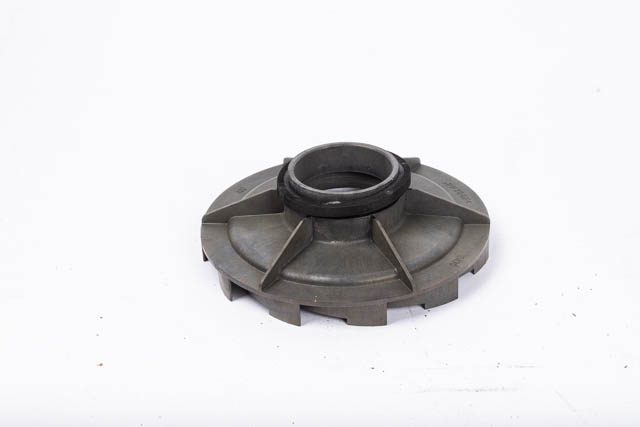
While you’re there, inspect the diffuser gasket/seal as shown below. Unless it was replaced recently, it’s probably a good idea to replace it while you have the pump apart. They only cost a few dollars.
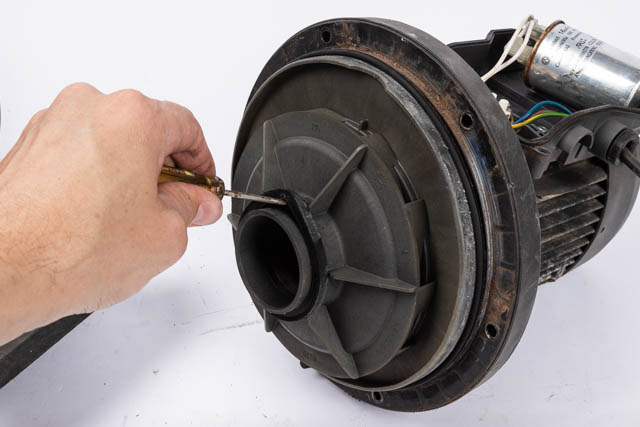
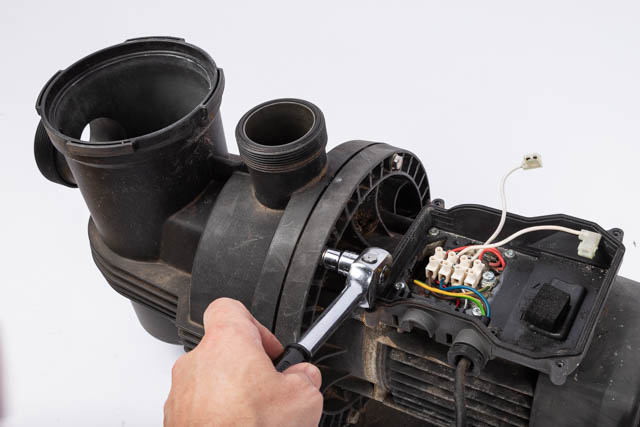
Step 4) Stop the Shaft from Spinning
The impeller can be unscrewed in a counter-clockwise direction. But before you can do this, you’ll need to lock the shaft of the motor to prevent the impeller from spinning when you try to undo it.
To lock the shaft, at the end of the motor, there’s a screw slot or bolt head on the end of the shaft. You may need to take the end cap off the motor to access this.
Holding this will stop the shaft from turning.
Step 5) Remove the Impeller
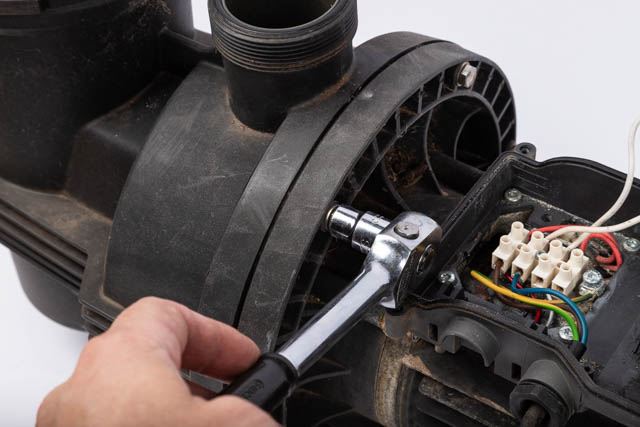
With the pump shaft held firm in place, unscrew the impeller in a counter-clockwise direction. If the pump is old, chances are it will be really tight.
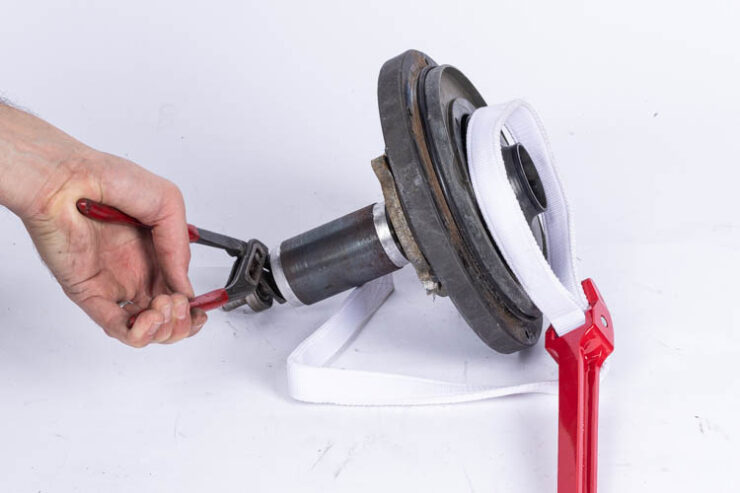
Do NOT use channel grips or any other metal tool to try to undo the impeller. You’ll likely crack it. Instead, use a strap wrench. You can use the type with a rubber strap or a material strap, as you see me using in the picture below.

Note: Some impellers have a set screw in the middle of them which needs to be removed before the impeller can be unscrewed. Others may have a screw on the side of the impeller that needs removing.
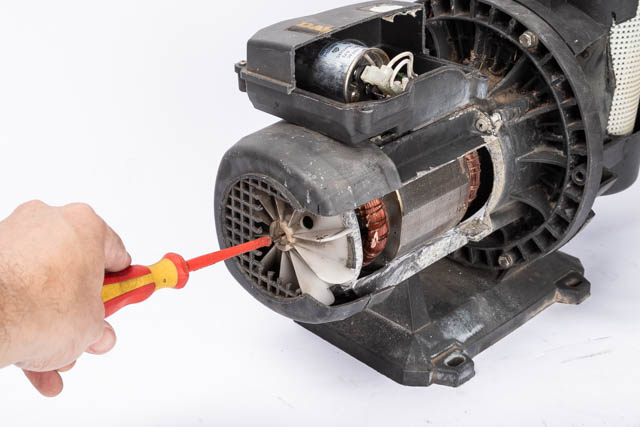
Impeller Won’t Come Undone
In the picture below, I wasn’t able to hold the shaft tight enough to replace the impeller. Instead, I had to remove the motor shaft, so I could get a grip on it. If you have trouble with a tight impeller, I wrote an article on how I did this: Pool Pump Impeller Stuck on The Shaft: How to Remove
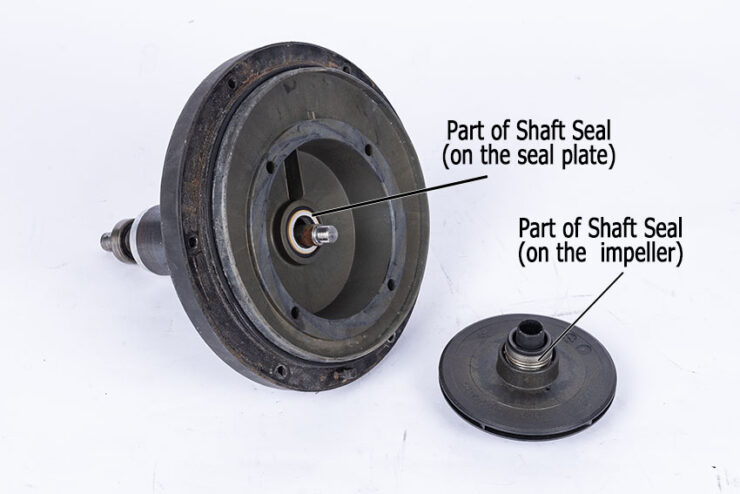
Step 6) Remove the Shaft Seal from The impeller
Now you have the impeller off, you’ll see the shaft seal. It’s in two pieces. You can see this in the picture below.
As you can see though, I had to pull the entire motor shaft out of the motor body as the impeller was tight and the shaft kept turning when I tried to undo it.
Before you remove the seals, take a picture and note which way around the seal in the impeller goes.
To remove the seal from the impeller, twist it and work it away from the impeller. It’s not screwed on but you’ll need to twist and pull to get it off.
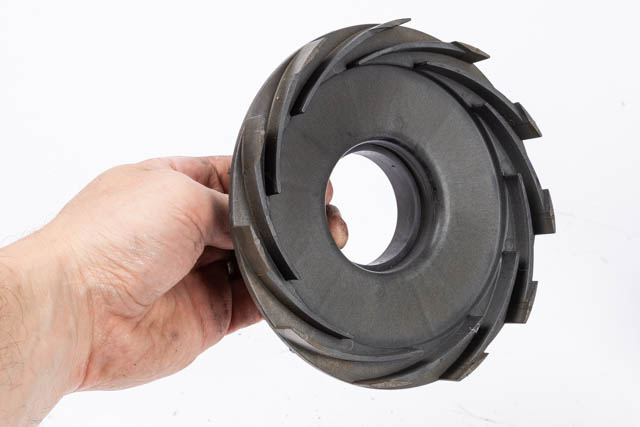
Inspect the threads of the impeller to make sure they’re in good condition. If the impeller is cracked or damaged, replace it.
If it’s in good condition, clean up where the spring was sitting in the impeller. So there is no debris or junk in the hole. Don’t use any oil-based products to clean it.
Step 7) Replace the Impeller Seal
Now you can fit the new impeller seal. It’s important to wear gloves to do this. You don’t want the oils from your hands ruining the seal.
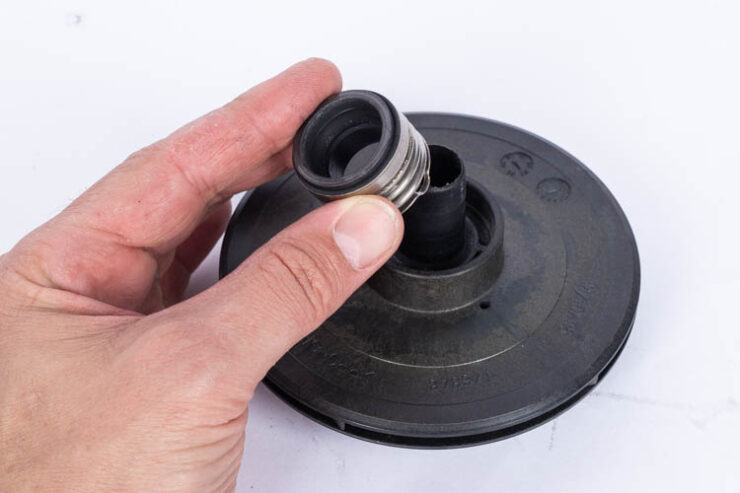
The impeller shaft seal goes only one way around. The hard plastic part goes at the top facing the motor and the rubber part is inserted into the impeller. When you insert the spring part, make sure you push it all the way down.
Step 8) Remove the Ceramic Shaft Seal from the Seal Place
The white ceramic seal is simply pushed onto the seal plate. You can try pulling it out with your fingers or prying it out. But be careful not to damage where the seal sits otherwise the pump may leak.
You may need to tap it out from the back side of the seal plate with a screwdriver and hammer.
After it’s removed, clean the seal plate of the pump where the seal was sitting. Don’t use any oil-based products. Also, check that the pump shaft doesn’t have any rust or gunk on it. Sand the rust off and clean any gunk on the shaft.
Step 9) Fit the New Ceramic Shaft Seal
Again, it’s very important not to touch the seal with your hands. Wear rubber gloves. Push it back into the seal plate to fit it. You can tap it gently back in place with the plastic end of a screwdriver and a hammer if it won’t go in.
Make sure it sits flush with the seal plate.
Pro Tip: If the shaft seal is difficult to put in, try wetting it. Failing that, put the white ceramic part in the freezer for an hour. Then insert it into the rubber part. It should now slide straight into the seal plate.
Step 10) Screw on the Impeller
The impeller can now be screwed on in a clockwise direction. Lock the shaft the same as you did when you undid the impeller. When you tighten it, hand tight is OK. Do not use anti-seize or thread lock on the impeller.
Step 11) Fit the Diffuser Back On
Push the diffuser back in place and replace the gasket on the end of the diffuser unless it’s fairly new. If there were any screws holding the diffuser in place, put them back in.
Step 12) Screw the Pump Housing and Motor Together
Check the o-ring seal around the pump housing before reassembling. Use some seal lube to make sure it doesn’t leak. It should be shiny, firm, and not have any cracks. It’s actually a good idea to replace it anyway.

Now gently fit the two halves back together. Tighten the bolts a little at a time so that they evenly tighten. Also, be careful that the seal/o-ring stays in its proper place.
Step 13) Reinstall the Pump
Now you can reinstall the pump. It’s the same procedure as removal but in reverse.
Step 14) Prime the Pump and Test
Before switching the pump back on, fill the strainer with water and replace the lid. Now you can switch on the circuit breakers.
Celebrate a job well done! Your new reconditioned pump shouldn’t leak and should last years longer.
Pump Still Leaking After Replacing Shaft Seal
After all that work, you may find that your pump is still leaking after replacing the seal. This can be super frustrating but it’s usually a simple fix.
Here’s what I suggest:
- Did you diagnose the leak was definitely coming out of the pump near the motor and not from higher up?
- Did you replace the pump housing o-ring gasket? Sometimes, even if they’re fairly new, they can leak if not renewed.
- Is the shaft seal correctly orientated on the impeller?
- Is the ceramic shaft seal seated all the way in on the seal plate?
- Did you order the correct seal? Did you compare the old and new parts? Did they look the same?
- Has the pump run dry? If it has, the seal could be ruined and will need to be replaced.
Shaft Seal Replacement Costs
You can either go the DIY route or get a pro in.
DIY Shaft Seal Replacement Cost
Shaft seals are sold in kits. They usually contain a white ceramic seal with a rubber surround, and a spring with a rubber part attached. The cost of a shaft seal kit (mechanical seal) is $10 to $20.
Professional Pump Shaft Seal Replacement Cost
If you’re not handy or don’t have an hour or two to do the job, you may want to get a pool professional to replace the seal on your pump. It’s a fairly easy job to do and will cost $100-$200. It will of course depend on your location and the labor rates your pool technician charges.
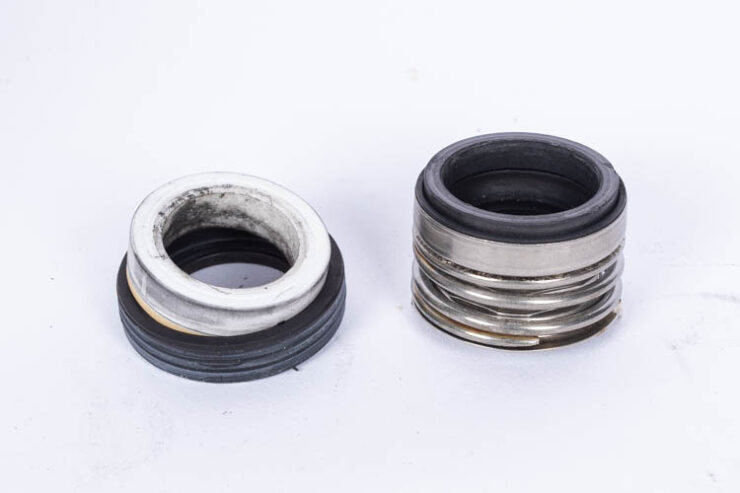
Which Way Does the Shaft Seal Go?
There are two parts to the mechanical seal. The ceramic white part of the seal with the black rubber part and the spring part.
The ceramic white part of the seal with the black rubber part pushes into the seal plate of the pump. Not the impeller. When you put it in, make sure you push it in all the way until it won’t go any further.
You may have noticed that the spring part of the shaft seal has two different ends.
Although it’s possible to put it both ways, it only goes one way around. So which orientation should it be? The end of the spring with the rubber soft part should be inserted into the impeller. The hard end will face the white ceramic seal and motor.