The diffuser for a pool pump is located inside the pool pump housing. It sits over the top of the impeller and directs the water flow.
In this article, I’m going to show you how to check for common pump problems that are caused by a bad diffuser. Then we’ll get into a step-by-step guide on how to replace a broken pump diffuser and the associated diffuser seal (gasket).

Article Contents
Signs of a Bad Pump Diffuser
You suspect there is a problem with the pump’s diffuser. Before you rush in, there are some things you should check before dismantling your pool pump and renewing the diffuser. When a pool pump diffuser is bad, your pump could have these issues:
- Low pressure
- Cavitating
- Pump not priming
Keep in mind though that there are many causes of the above problems. A damaged diffuser isn’t the only thing and is one of the last things you should check.
If you do have low pressure in your filter, your pump is cavitating, not priming or losing prime, first check for these issues:
- Clogged or blocked impeller
- Low pool water level
- Bad pump lid o-ring (can cause an air leak)
- Clogged suction line
- Full skimmer or pump basket
- Dirty filter
Here are some resources to help you with some of these issues:
If after checking for the above issues your pump is still not working correctly, then it’s time to take it apart and check the diffuser and impeller.
Reasons Pump Diffusers Break
The diffuser can melt, crack or warp. How does a pump diffuser break in the first place? There are a few reasons:
- Warped and melted diffusers – caused by the pump running dry for extended periods of time. Or, in some cases, the wrong size impeller/diffuser combination. That is, perhaps you have replaced the impeller and you used a larger size.
- Cracked pump diffusers – caused by large debris getting into the pump e.g. large stick or something solid like a stone. This can be due to a pump basket with a hole or crack in it.
Cost of Replacement Pool Pump Diffuser
The replacement cost of a pool pump diffuser depends on the cost of the part and if you are going to do it yourself or get a professional in.
Diffuser Part Cost
Diffusers vary in cost depending on the brand or pool pump. They start at around $20 and go up to $65. This is for the part only. I would also recommend you replace the diffuser gasket seal ring at the same time. The cost of a diffuser seal is $5-$10.
I would also replace the pump housing o-ring seal when you open your pump up. You’re looking at another $5-$10 for the cost of the part.
Professional Pump Diffuser Replacement Cost
If you’re considering getting a pool technician in to replace your pump diffuser, you can expect to pay $120 – $250 for the job. It will of course depend on the cost of the parts and the labor rate in your area.
Most pool technicians charge $63 – $93 per hour. You can expect a job like that will take an hour or two.
How Long Does it Take to Replace a Pump Diffuser?
First of all, this is a fairly easy job to do if you’re handy. Even if you aren’t so handy, it likely isn’t beyond you.
If you’ve never done this job before, I would allow 2-2.5 hours, providing you have all the parts on hand. It’s likely that you may need extra seals that you didn’t purchase before you started the job. In this case, you’ll need to order them or take a trip to your local pool store.
Steps to Replace Pool Pump Diffuser & Seal
1. Turn Off the Pump At the Breaker
Before starting any work on your pump, be sure to unplug it and switch it off at the circuit breaker. You don’t want it accidentally turning on when you have it apart.

2. Release the Filter Pressure Relief Valve
With the pump off, open the filter’s pressure release valve. This will remove the pressure from the system.
You can find this valve either on the top or side of the filter tank. Expect that water will squirt out when you open this valve. Just wait for this to slow down. The pressure gauge will also drop to zero.
3. Remove the Pump Lid
Take the lid off the pump.
4. Remove the Pump Housing Bolts or Band Clamp
You need to separate the pump housing from the motor.
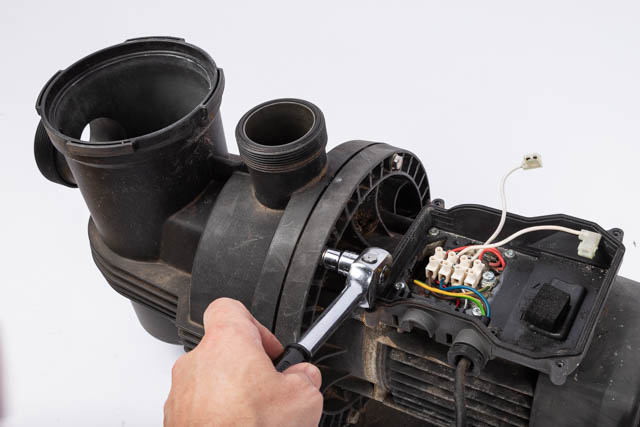
All pool pumps are joined together with either bolts or a metal band clamp around the middle of the pump. Undo these.
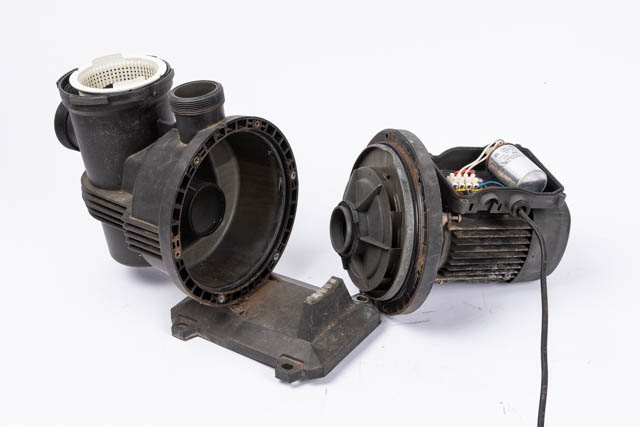
5. Separate the Pump Housing and Motor
With the pump housing bolts or band clamp removed, you can now separate the motor from the housing. Just give it a good hard pull and wriggle it. Tap it with a mallet if it won’t shift.
If you’re still having trouble, check you’ve removed all the bolts. I’ve been guilty of this before! It’s easy to miss something.
6. Remove the Diffuser
You can now see the diffuser. It will either be attached to the motor side or may still be in the pump housing side.
Give it a gentle pull to remove it. It should just slip off.
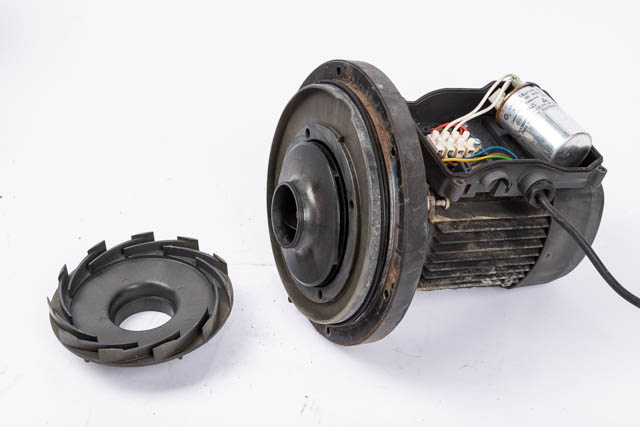
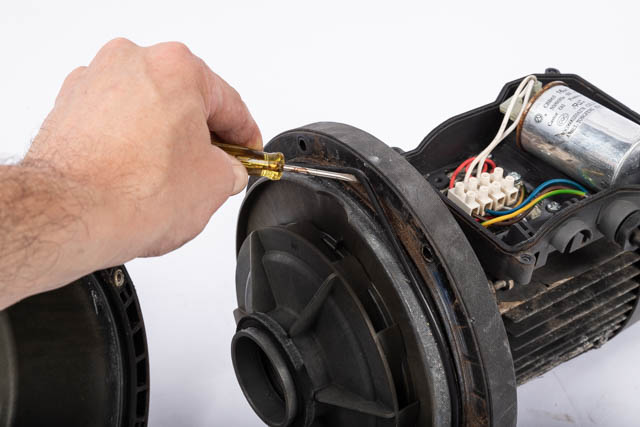
Some pumps use screws to fix the diffuser to the motor seal plate. You’ll need to remove these to get the diffuser off.
7. Inspect the Diffuser & Impeller
Carefully check the diffuser for cracks, warping or melting. If it’s melted, it will be pretty obvious.
If you have been having trouble with your pump, spotting an issue like this is a great sign. You now know that replacing this should fix your pump.
With the diffuser off, also inspect the impeller for cracks or damage. Check the veins around the outside and also check the center for cracks, near the shaft. This is where impellers usually crack.
Replace the impeller if it’s damaged. We have an article on that here.
While you have the pump apart, you could also replace the motor shaft seal if it is more than a few years old. It’s common for these mechanical seals to leak.
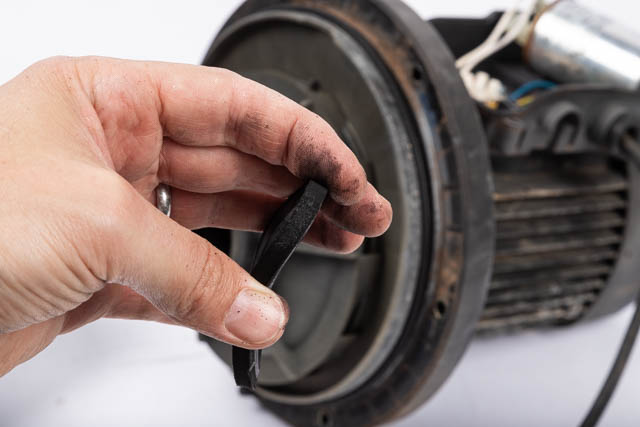
8. Put the Diffuser Seal Gasket On
Take the diffuser seal off the old diffuser and inspect it. If it’s cracked, misshapen or black comes off on your fingers, it’s time to replace it.
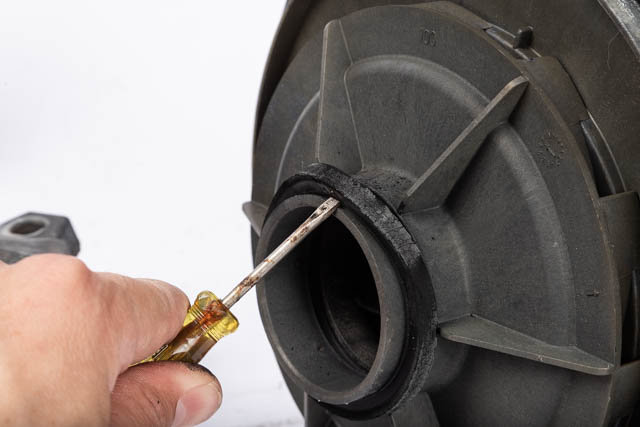
Now fit the new diffuser gasket on the new diffuser. Make sure you use o-ring lubricant. This will make the gasket last longer and give a better seal.
9. Fit the New Diffuser
Before you put the new diffuser on, check the part number is the same as your existing diffuser. Also, hold the two parts up against each other to check they are identical. You don’t want to reassemble the pump with the wrong part installed. It will likely cause a leak or not work correctly.
Fit the new diffuser by gently pushing it back onto the motor side of the pump. Ensure it is the right way up. Some diffusers will have a mark, arrow or text to indicate the top. For other symmetrical diffusers, it may not matter which way around they go.
If you had to remove screws to remove your diffuser, put them back in.
10. Put the Motor and Pump Housing Back Together
Inspect the pump housing o-ring before fitting the motor and housing back together. Take it off to do this. Replace the o-ring if it is damaged or perished.
Before putting the o-ring back, clean out the channel that the o-ring sits in and also make sure the mating surfaces of the pump housing and pump motor seal plate are clean and free from debris. This step will help prevent leaks.
Use a thin layer of o-ring seal lube on the o-ring before fitting the motor and housing back together. When start fitting the motor and pump housing back together, make sure that the o-ring is in the correct place and hasn’t moved. It will leak if it’s not located correctly.
Put the bolts back in or the band clamp back on. When tightening the bolts, do it evenly and slowly. Tighten the top and bottom bolts first to finger tight, then the side bolts (opposite sides), and then any other bolts. Now repeat and tighten so they are tight. This will ensure the motor sits correctly with the housing.
11. Prime the Pump
Close the filter’s pressure relief valve. Pour water into the pump housing, so it’s full to the brim. Fit the pump lid back on.
12. Switch on the Circuit Breaker & Test
Switch on the circuit breaker and start your pump. Look carefully for leaks. And also check the filter pressure settles to the normal pressure.