Using a chlorinator or chlorine feeder normally makes your life much easier. But sometimes, your chlorine feeder can leak which is frustrating but luckily, there are some easy solutions to use to fix your leaking chlorinator depending on the leak source.
Most of the leak sources in a chlorinator (chlorine feeder) come from its lid and o-rings. Water can also leak from the chlorine feeder’s unions, control knob, or from cracks in the main body. Luckily, these leakages are easily replaceable or repairable. The important thing is to find the source before attempting anything else.
Most of these issues will likely need a full replacement, but repairing them can be a great option preventing you from spending your hard-earned money if it’s an easy fix.
Common Chlorinator (Chlorine Feeder) Leak Sources
Firstly this article relates to a chlorinator, aka chlorine feeder, and not a saltwater chlorine generator (SWG). Salt chlorine generators are sometimes called chlorinators. If you have a leak here, check out this article: How to Fix a Leaking Saltwater Generator Cell
As mentioned above, the most common sources of leaks are from the lid and o-rings. Though, lid leakages tend to go hand in hand with a malfunctioning o-ring. Less common leaks are from the unions, control knob, or cracks.
Water Leaking from Chlorinator Lid
Aside from o-rings causing your chlorine feeder’s lid to leak, the other reasons are a cracked lid or the lid screw isn’t completely secure (as seen in Hayward Chlorinators).
If you find that the lid has cracks, the best option here is to replace the lid. All you need to do is take note of the make and model of your chlorine feeder and you’ll be able to find a matching replacement part.
In some cases you may be able to glue the lid with epoxy. It may or may not last the test of time though. You can try a product like JB-Weld.
- Repair pipes, glue pool tiles on, fix plastic components
- Can withstand high temperatures
- Will cure underwater
If you’re using a Hayward Chlorinator, there is a screw on the lid hiding under a soft cap. When working with the o-ring inside the deep lid, you need to untighten the screw. If you don’t properly screw it back into place, water will leak out from here.
This video shows you how to fix a leaking chlorinator or chlorine feeder lid:
Water Leaking Because of O-Rings
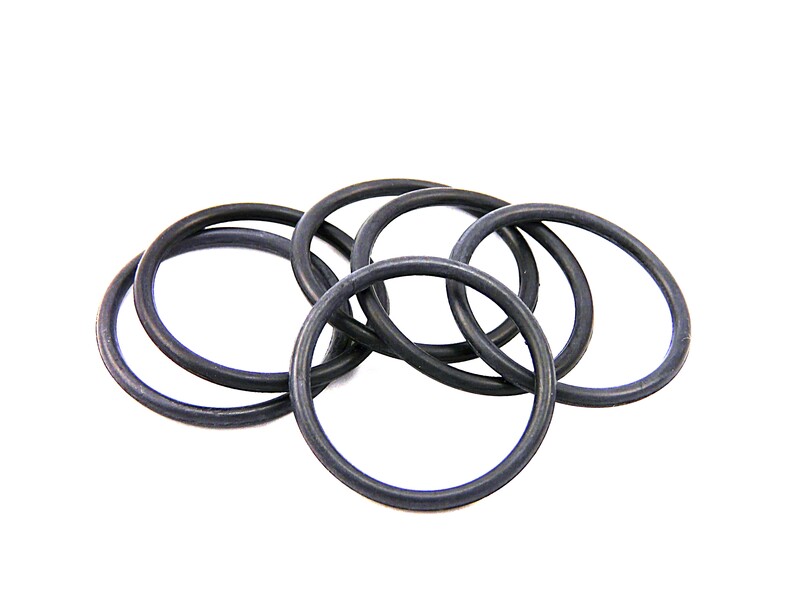
If you’re losing pool water through the lid of your chlorinator, the most likely cause is from a dirty or old o-ring. Some o-ring manufacturers report their product having a lifespan of 7 years but in reality, it’s much shorter than that. Generally, o-rings often only last a few seasons of pool use.
Even though cleaning out the o-ring and reapplying lube can fix an o-ring, the cheap cost of replacement o-rings is the best option to go with.
Although there are different brands of chlorine feeders, the most common models include Jandy TruClear and Hayward Chlorinator CL200 so the following sets of instructions are based on their specifications.

Fixing a Jandy TruClear O-Ring
To fix a leaking chlorinator’s o-ring, using Jandy’s TruClear as an example, follow these steps:
- Turn off the pump first. Or switch off the breaker to be certain the system is offline.
- Then, bleed most of the air from the filter system. Do this by opening the pressure release valve.
- Once you’ve bled air, you can take the lid off the chlorinator. With the TruClear, you’ll need to turn the outer ring to the left to unlock it.
- Inside the lid is one of the o-rings. So, get something like a flathead screwdriver and carefully work it under the o-ring to pop it out of the groove. Careful not to damage the plastic surrounds.
- Next, lubricate the new o-ring before you place it into the now empty groove.
- Once it’s ready and in position, make sure the o-ring is sitting correctly in its place (moving the outer ring lid to help pop it into position).
- On the lid of a TruClear salt cell, there should be an arrow telling you the direction of water flow. And there should be an arrow on the pipeline too. Secure the lid back into place so these two arrow line up for a tight seal.
- Finally, you can turn the pump back on. Or switch back on the breaker.
Fixing a Hayward Chlorinator CL200 O-Ring
Although the steps to replace the o-ring itself are the same as they are in the TruClear steps, the CL200 lid is different from other models. So, to fix a CL200 o-ring:
- First, turn off the chlorine feeder system by switching off the pump. Release the pressure in the filter by opening the pressure release valve.
- The CL200 lid has a little clip at the side to help keep it secure. Push this clip and twist the lid to the left to release it from the unit.
- However, the o-ring in this model’s lid is hiding deeper in the lid than it is in the TruClear. At the top of the lid there should be a soft cap protecting a screw. Unscrew this to partially dissemble the lid, and expose the o-ring.
- Follow the same o-ring replacement steps as the ones mentioned above.
- Make sure to place the cap back on after securing the lid screw back into place.
- Then, you can add chlorine tablets into the feeder, if you wish.
- Twist the lid back onto the unit and make sure the lid locks into place, with the clip latching on.
- Finally, you can turn the pump back on to test the lid isn’t leaking anymore.
Related Reading: Beginners Guide to Saltwater Pool Maintenance
Other Common Sources of Leakages
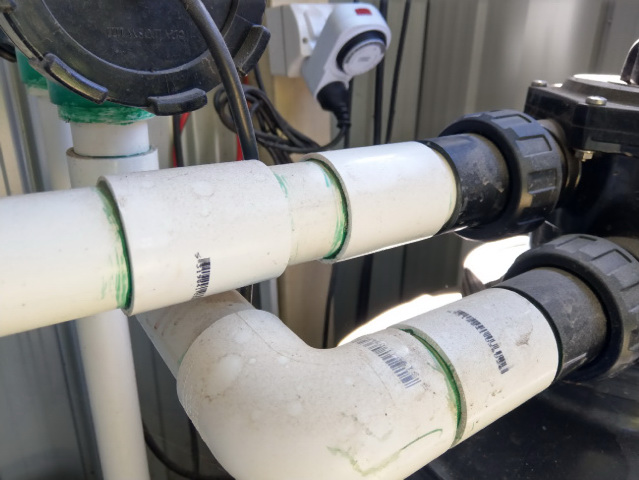
UNIONS are the threaded fasteners that secure each pipe to its joint. Cross-threading is the main culprit for leakages at unions. It’s an easy fix, only requiring you to loosen and realign the union so it screws down, creating that hermetic seal.

CONTROL KNOBS, or control valves, leak probably due to the o-rings inside it. It will depend on the model of chlorine feeder you have, but the only resolution here is to replace the knob. Most control valves will pop off from the main body and therefore are easily replaceable.
CRACKS can sometimes appear due to age. They usually arise in the chlorine feeder housing. Although it’s probably better to replace the whole unit, there are epoxy products that can temporarily seal the cracks.
J-B Weld Epoxy Stick is one such product. This putty stick is kneadable so you can make sure you’ve just the right amount to seal over any cracks. And it’s certified to be safe with potable water, i.e., pool water. Although it has a rating of 4.3 stars out of 6,635 reviews, most of the low rating customers were unhappy with its ability to stay in place.
CHLORINATOR HOSES are also known to leak. They can have holes in the hose or where they connect into the chlorinator or pool pipes. To fix it, just replace the hose. You should be able to get a length of hose from your pool store.
Tips To Prevent Leakages
- Replace your o-rings regularly. Although they have a 7 year lifespan, pool usage and maintenance will affect that number. Usually, o-ring need replacing every 3 years.
- Lubricate your o-rings properly. And make sure the lubricant is silicone based. A water-based lubricant will wash away quicker and wear down the o-ring sooner than a silicone one.
- Whenever you are working with the unions, whether replacing something or carrying out maintenance, make sure the thread of both male and female fasteners are in perfect alignment and tight, but not over tight.
- Regularly check over the piping and chlorinator housing to see if there’s any evidence of stress fractures appearing.
Related Reading: How to Fix A Pool Filter Leaking From Backwash Hose or Outlet


I have a Hayward cl200 chlorinator, I have been getting bubbles into the pool. No bubbles in pump basket. If I turn the knob up all the way the bubbles stop ,but the chlorinator leaks out the top.
Air bubbles in the pool could indicate an air leak. It sounds like your chlorinator may have one if it is leaking. In some instances, you may be able to use epoxy to patch a small crack.