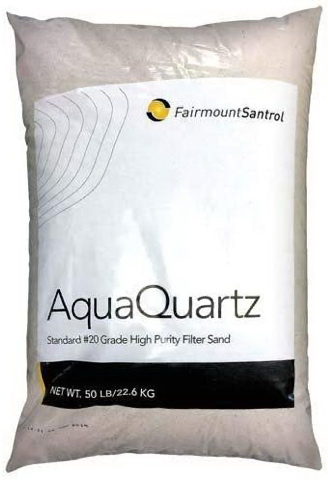
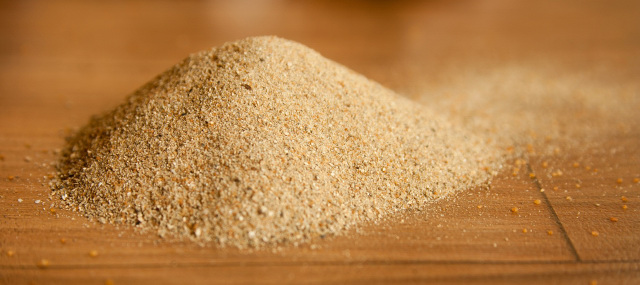
While it would be cool if the sand in a pool filter lasted forever, it doesn’t. If you suspect that it’s time to replace the sand in your filter, the question becomes how do you even go about doing it?
The hardest part of the job is actually getting the sand out. And there are a couple of ways to do it.
Here’s the easiest way to replace sand in a pool filter:
- Scooping it out
- Sucking it out with a shop vac (wet-dry vac)
If you’re feeling a bit of trepidation over changing out the sand in your pool filter, worry not! This guide will tell you everything you need to know. We’ll discuss when to replace the sand in your pool filter and the type to use. We’ll also go step-by-step and expound on the instructions above, so keep reading!
Article Contents
What Type of Sand Should You Use in a Pool Filter?
You can select from three types of pool filter sand: glass, zeolite, or silica. The kind that’s most appropriate for your filter is that which the pool manufacturer or filter manufacturer recommends.
Let’s go over the three types of pool filter sand now.
Glass Sand for Pool Filters
The first type of pool filter sand is glass sand. Glass is partially comprised of sand as well as limestone and soda ash, so it makes sense that it’s usable as sand as well.
If you often want to filter out incredibly tiny particles from your pool, then you should select glass sand. The size of the particles that a glass and pool filter can capture is between three and five microns.
Algae spores are often around this size, so by preventing them from lingering in the pool, you can prevent larger swathes of algae from growing in the water.
Zeolite Sand for Pool Filters
Zeolite is a type of aluminosilicate microporous mineral that’s regularly used as a catalyst and adsorbent.
When broken down into small sand-like particles for a pool filter, zeolite sand can catch particles that are at least 10 microns.
That’s not as microscopic as the particle size that a glass sand pool filter can capture, but it’s enough to grab the most common pool contaminants before they accumulate and cause a bigger issue later.
Zeolite sand has yet another benefit. The sand can keep your pool’s chlorine content balanced by attaching to chloramines.
Silica Sand for Pool Filters
The last type of sand you might consider for your pool filter is good ole silica sand.
The granular silica naturally contains minerals, clay, coal, and quartz, with the latter more plentiful than the former ingredients.

Nicknamed industrial sand and quartz sand, silica sand is low-cost, widely available, and thus the most common.
Silica sand only filters particles to a size of 20 microns or 0.0008 inches. If you’re trying to rid your pool of minute particles, then this is not the right type of sand to add to your filter.
The Easiest Way to Remove Sand from Your Pool Filter
As we said we would, let’s now explain the steps to removing and replacing the sand in your pool filter.
Step 1 – Gather Supplies
You don’t want to find out in the middle of replacing the sand in your pool filter that you’re missing a supply or two. Instead, you must have everything close by and ready to use.
We’d recommend some silicone lubricant, tape, and a new O-ring or two for the multiport valve. Oh, and sand as well, and plenty of it. We’ll tell you in the next section exactly how much sand you should have!
Step 2 – Backwash Then Power Off Your Pump
Start by backwashing your filter.
Next, turn the pump off. You do not want the pump running when you’re working on your filter. Not only will the water go everywhere but you could burn out your pump.
Find your circuit breaker and turn the entire pool off, including the pump and your timer.
Step 3 – Drain the Filter Tank
Your filter tank will usually have a drain cap nearer the bottom. When you open that, you can empty the water from the tank as well as any pressure filter that’s accumulated.
How do you open up the drain cap? Turn the cap counter-clockwise once and the air should begin to come out. Stand far away as the high-pressure air releases, as you don’t want to hurt yourself.
Once the pressure comes down, you can take the cap out to allow the water in the filter tank to drain. Without a hose to redirect the water, the water will spill onto the ground directly below you.
Further Reading: How to Drain the Water from a Sand Filter
Step 4 – Detach the Multiport Valve
Next, you need to remove the multiport valve’s waste hoses, return, and pump. The multiport valve, if you’re not familiar, is at the top of the filter. It’s the valve that controls the filter settings e.g. filter, backwash, etc.
Once you detach the above parts, you should be able to easily access the multiport valve flange clamp. This is what keeps your pool filter where it is.
The multiport valve flange clamp is usually held into place with a couple of bolts, so you may need a screwdriver to detach them.
You’ll also have to put some elbow grease in, pulling upward to detach the valve from the pipe.
Some multiport valves have unions instead of screws. Again, you can use a standard screwdriver for disassembling the unions.
Be sure to hold onto the unions or screws and keep them somewhere secure, as you’re going to need them later when you reassemble everything.
Step 5 – Remove the Old Sand With a Shop Vac
Have your tape ready. Cover the top of the stand pipe (the pipe in the center of the filter) with a plastic bag and tape it up (or use an elastic band) to hold it in place. If you don’t cover this up, then the sand can easily enter the laterals and clog them up, potentially ruining your filter.
Now, you have TWO options for removing the pool filter sand:
Option 1: Scoop it out. Using a small container, start scooping. This is going to be tedious work and isn’t the easiest way.
Option 2: Use a shop vac to suck all that sand out. This will help you get right to the bottom. You may need to add some water to the filter to help the sand come out.
You might find you need to use a combination of the two methods. You’ll likely find though, a shop vac is the easiest and fastest way to remove the sand.
Pro Tip: be very careful of the standpipe and laterals. These are the pipes inside the filter. They can be fragile and easy to break.
Further Reading: What To Do with Old Pool Filter Sand (Answered!)
Step 6 – Disassemble the Pipe and Lateral Assembly
Speaking of the laterals, they and the pipe have to come out. You should only have to turn the lateral pipe 5-10 times to unscrew it.
Once you have the pipe free, remove any lingering traces of sand. Now is also a unique opportunity to look over the laterals for signs of damage.
Step 7 – Clean the Tank
Next, you might as well clean the pool filter tank. You can use a garden hose to do this. When you’re finished, leave some water in the tank, about half, so the laterals don’t get gunked up with sand when you add the new stuff.
If you’ve disconnected all the pipes, you can move the filter to a more convenient place to do this.
Step 8 – Reinstall the Pipe and Lateral Assembly
Now it’s time to put the pipe and lateral assembly back together. You can ensure the laterals are in the right spot by rotating 10 times in the direction opposite of the one you did before. Be sure to adjust the laterals so they’re positioned downward.
Step 9 – Add in New Sand
Once again, take the exposed side of the pipe and apply tape over it. This will prevent the laterals from getting clogged with sand. You want the pipe in the middle of the tank as you pour the sand in.
Start slowly so you can position the standpipe and laterals properly.
Step 10 – Check Your O-Ring
Under the multiport valve is an O-ring. If yours seems like it’s even a little worse for wear, it’s a good idea to put a new one on.
Should you decide to keep your current O-ring, then lubricate it slightly and re-fit it.
Step 11 – Reattach Everything Else and Backwash
To wrap up, put everything else back where it was, including the multiport control valve and the valve clamps with any unions or screws.
Don’t turn your pump back on quite yet. Instead, set the multiport control valve to its backwash setting. Now you can finally run your pool pump.
You want to flush the pool for two minutes. Turn the pump off after that time has elapsed and turn the multiport control valve to the rinse setting.
Power the pump back on and wait for the water to run clear. That should take about a minute. Be sure to set the multiport valve to the filter setting after backwashing it.
If you’re more into videos, here’s one showing you how to get the sand out the easy way:
How Much Sand Do You Add to a Pool Filter?
You understand the process of replacing sand in a pool filter, but how much sand do you need to add to the filter?
That usually depends on the diameter of the pool filter tank. That said, you want to double-check the volume of your pump before you pour a bunch of sand in.
If you’re lucky, your filter will have a label on the side of it detailing how much sand you’ll need.
If you don’t have the instructions or a label on your filter, you can use these estimates according to the tank diameter.
| Tank Diameter | Sand Needed |
| 16-inch | 100 pounds |
| 18-inch | 150 pounds |
| 19-inch | 175 pounds |
| 20-inch | 200 pounds |
| 22-inch | 250 pounds |
| 24-inch | 300 pounds |
| 27-inch | 350 pounds |
| 30-inch | 500 pounds |
| 36-inch | 700 pounds |
We do want to stress reading and then rereading the manufacturer’s instructions so you add just the right amount of pool sand.
Pouring in too little will prevent the pool filter from working to its full potential. Your pool will get dirtier faster, and you won’t understand why.
If you dump in way too much sand, then the pool pressure can increase to such a degree that the filter will again stop working well.

How Long Does Sand Last?
If you just changed out the sand in your pool filter, you’re going to be exhausted. You’d like to avoid doing that again very soon.
Well, the good news is, you can! Pool sand lasts anywhere from three to five years. That’s why it’s a good idea to check the O-ring and other parts of your pool filter while you’re removing the sand. You don’t get to see these parts very often otherwise!
How Do You Know When to Replace the Sand?
Of course, like anything, you might not quite get three years out of your pool sand. The following signs indicate that you might need to change the sand out sooner than later.
The Sand Has Channeling
When sand channels, that means there are literally channels in the sand. The water can then take a shortcut through the channels avoiding the sand. The water doesn’t get filtered much. In some cases, the water exits the filter without having been filtered, which is very problematic, as your pool will become dirty.
You’ll have to open up the filter to see this. Do you see ridges around the edge of the sand? Then the water is channeling through the filter and not coming out clean.
Why does this happen? Usually, it’s due to using a pool pump that’s larger than what your pool needs. Try downsizing the pump and the channeling issue should work itself out. Or the sand could be old.
The Backwashing Sessions Get Shorter and Shorter
When you first put your new pool sand in the filter, it backwashed for a while. That was true the next time you backwashed too and the next time.
These days, the backwashing sessions last a very brief time. That too is a sign that you might need to replace the sand in your filter soon.
Your Water isn’t Clear
You clean your pool almost every single day and yet it always looks cloudy or murky. It could be that your pool filter isn’t pulling its weight. Once you change out the sand, it should begin filtering a lot more efficiently than it was.

Further Reading: When to Change the Sand in the Pool Filter (And the Risks)
Conclusion
Pool filter sand lasts for three to five years, so around that time or earlier, you’ll have to replace the sand. You can choose between glass sand, zeolite, or silica sand.
We hope the information in this guide helps you replace the sand in your pool. Good luck!
Related Reading: How to Choose the Best Pool Pump for an Intex Pool


