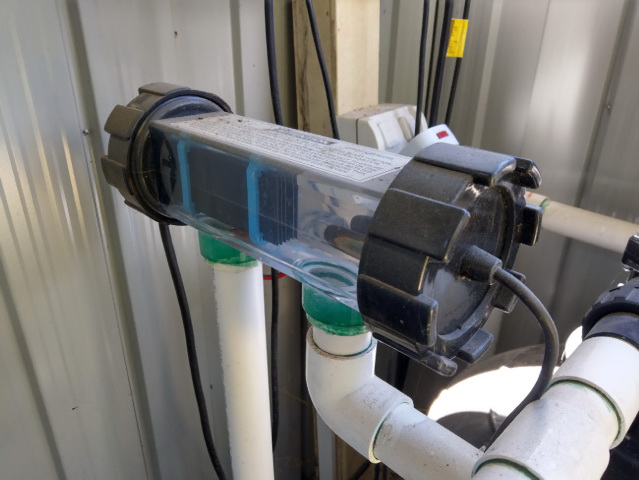
Saltwater generators are a great natural way of sanitizing swimming pools. The salt cell naturally generates chlorine minimizing the need to keep buying chlorine to maintain your pool hygiene.
For a saltwater generator to function properly, and most importantly, last longer, you need to maintain it regularly.

Article Contents
Salt Cell Maintenance Depends on Your Pool
The level of maintenance the saltwater chlorine generator needs depends on factors such as the type or model of salt chlorinator, amount of water in your pool (gallons), the type of pool (i.e., outdoor pool, indoor pool, hot tub, etc.), and the location of the pool (i.e., pools in areas with hot and humid climates have different needs from pools in cooler climates).
You may also want to consider the type or model of salt chlorinator to use for your pool. Different models have varying performances in your pool, and the labor required for maintenance also varies.
For example, the Hayward Aqua Troll model, which is great for use in above-ground pools, is a maintenance-free salt chlorinator once you install the system. The Hayward Aquarite Model can be used in up to 40,000-gallon pools but requires regular maintenance.
Even so, each of these models has common components that need to be checked regularly when treating your pool. Below are some tips you can apply while maintaining your saltwater generator so it can perform optimally and serve you for many years.
1. Clean the Salt Cell
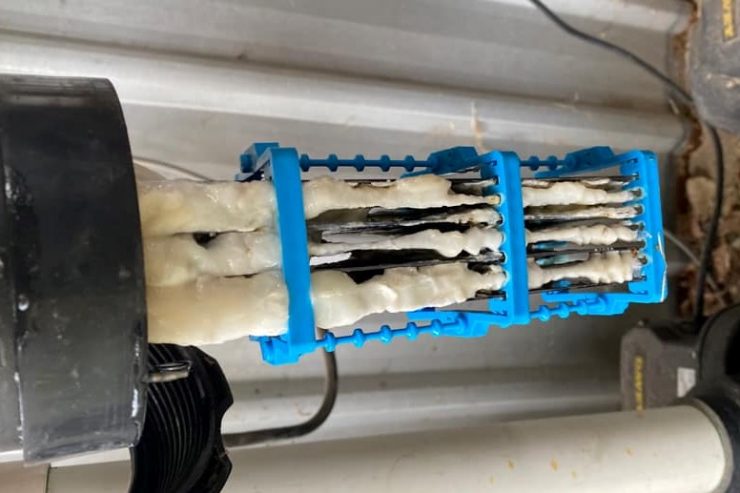
This generally involves washing the salt cell using chemicals like muriatic acid to remove calcium deposits. Doing this will optimize the electrolysis process (conversion of saltwater to chlorine).
This should be done on a day scheduled for maintenance when the pool is not in use as the pump will be turned off.
If you’re using muriatic acid, be careful not to overdo it or clean it too often as the metal parts in the salt cell will start corroding. It’s best to clean the salt cell two or three times a year depending on how much calcium has accumulated in your salt cell.

If the calcium deposits keep building up quickly, you can soak it in a non-acidic cleaner for about 30 minutes then rinse it with water.
An important factor you may need to consider to reduce salt cell maintenance is keeping your pool well balanced. For example, monitor the pH levels or alkalinity of the pool and check the salt levels. You can also involve a pool technician once a year in inspecting your pool and chlorine generator.
The frequency of cleaning your salt cell largely depends on the water type, its quality, and the location of the pool. How heavily the pool is used, for instance, frequent swimming can also determine how often you need to clean the salt cell. The more the swimmers, the longer you need to run the salt cell. And that means you’ll need to clean the salt system more.
2. Replace the Salt Cell Every 3-5 Years
Replacing your salt cell may feel like an expensive investment but it’s kinda inevitable if you want to keep your pool clean and hygienic.
Depending on how well you maintain your pool, replacing can be done every 3 to 5 years. The better balanced the chemistry of your pool is, the longer the life of the salt cell. Replacing the salt cell may cost anywhere between $400 to about $1,000.
You need to also look out for signs showing your pool or salt cell is not working properly. For example, if the caution lights in the generator keep flashing or stay on, inspect the system. Otherwise, there’ll be no chlorine production, which is essential to sanitize your pool.
3. Maintain Correct Salinity Levels
It’s important to maintain salinity levels within the range of 2,700 and 3,500 ppm or whatever your instruction manual states. If the salt level is too high or too low, your salt cell won’t generate chlorine efficiently.
How frequently you check the salinity levels depends on the manufacturer of the generator’s recommendation. Usually, once a month is enough or after heavy rain or pool use. Both rain and splashing/topping up pool water will dilute the salt levels.
There are different methods you can use to check the salinity levels of your pool. These include:
- Reading the display on your digital salt chlorinator
- Using a liquid reagent test kit
- Using a digital water tester
- Using a handheld electronic meter
- Using salt test strips
All these methods provide a rough estimation of your pool’s salinity levels. The most accurate way to test is a quality liquid reagent (drop test) kit.
Keep in mind, often the readout on your saltwater chlorine generator isn’t accurate.
If you’re not sure how much salt you need for your pool, here’s a post showing you how to calculate pool salt levels.
4. Keep the pH Levels Correct
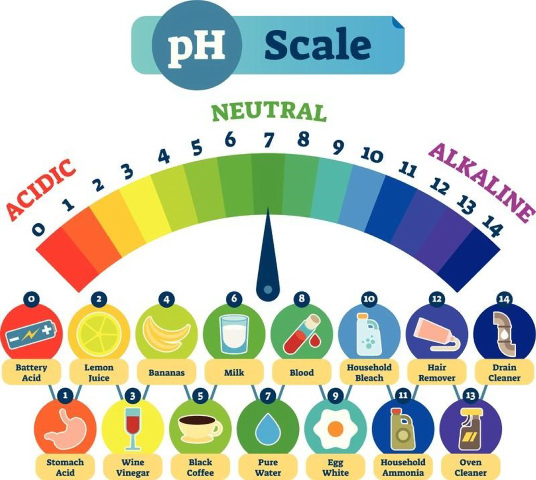
High pH levels, or high alkalinity, are a common problem in saltwater pools. They are the reason calcium builds up in saltwater generators.
Testing of pH and alkalinity is recommended on a weekly basis. Checking the amount of accumulated calcium deposits should be done at least monthly and depending on the pool’s water quality.
Calcium deposits often clog pipes which hinder the flow of water in the pool circulation system. This strains the system causing damages that incur more costs due to repair.

High pH levels may also cause the water to appear cloudy and in some cases, cause skin rashes, stinging eyes, and dry skin on swimmers.
To lower the pH, add chemical additives like muriatic acid and sodium bisulfate. The recommended pool pH levels range between 7.2 and 7.6.
5. Check Flow Sensors
Flow sensors are a component installed in one of the pipes in the salt cell system that detect if sufficient water is flowing in the system to produce chlorine. If the water supply is low, the “flow” LED light will flash red and the power will automatically turn off.
This could mean that you:
- Need to clean your filter
- Clear blockages on the suction side (like the skimmer)
- Increase the speed of a variable speed pump
If the “flow” light still flashes, yet you’re confident the pump is running properly, then you might consider replacing the flow sensor. A replacement flow sensor costs $50 to $150.
6. Check the Water Temperature
Temperature sensors simply give you the temperature of your pool as sensed by the generator control system. The minimum temperature required for saltwater generators to operate is about 60 degrees Fahrenheit. It varies from model to model.
If the pool temperatures fall below 60 degrees, your system will stop working and the salt cell will stop producing chlorine.

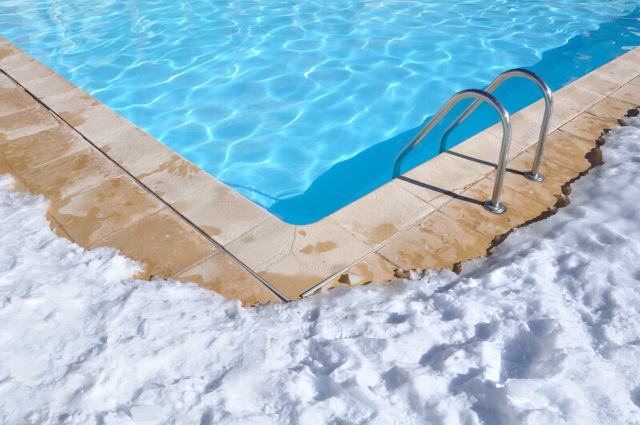
This is a common phenomenon during the winter season when temperatures fall to freezing levels. However, there are measures you can take to keep your pool and salt cell system running during the winter season. For instance, you can turn on the pool heater once the temperatures start dropping below 60 degrees Fahrenheit.
It’s important to keep the salt cell system running so chlorine may continually be produced to sanitize your pool. Keep in mind, in cold weather, your pool will require a lot less chlorine.
If your salt system shuts down in the cold, you can manually add liquid chlorine or chlorine tablets to maintain the correct level of chlorination.
7. Repair Salt Cell leaks
Most saltwater generators are plumbed with PVC pipes or flexible hoses that connect the saltwater generator to the pool. These pipes usually have unions, joints, o-rings, bolts, and nuts connecting them and are the areas to check for possible leakage in your saltwater system.
Unions are threaded fittings that allow for easy removal of the cell for cleaning or replacement. If there’s leakage around them or the joints, tighten them up or replace the rubber sealing ring (o-ring) if it’s damaged. If leaking occurs around one of the bolts, either tighten it up or replace it, depending also, on the extent of the damage.
The actual cell itself can also leak through external rubber seals, or in rare circumstances, through cracks occurring on the plastic case. Sometimes cracks can be repaired with epoxy.
If the damages are so severe or none of these tips work for you, you may consider replacing the entire cell.
8. Control Unit Replacement
The control unit is responsible for providing electricity that aids in electrolysis, a process that ionizes sodium chloride in salt to produce chlorine.
It also controls how much electricity enters the salt cell system thus determining the amount of chlorine produced.
Unfortunately, the lifespan of the control unit is pretty much unpredictable since electronics may develop faults unexpectedly. They can, however, last up to 7 years and their replacement costs range from about $500 to $1,500.
Related Reading: Which Chlorine to Use for Inground Pools?


