At first glance, a few loose or broken pool tiles may not seem like such a big deal. The truth is, that cracked tiles can ruin everything there is to love about your pool.
Not only are they an eyesore, but broken tiles can cause leakage, creating much bigger problems for your pool area. That’s why it’s vital to repair loose and broken tiles as soon as you notice them.
In this article, we’ll show you step by step how to replace pool tiles. We’ll also explore:
- Adhesive options for pool tiles
- Fixing underwater pool tiles without draining
- The best grouts for pool tiles that get wet

Article Contents
Can You Replace Pool Tiles Without Draining?
In many cases, underwater pool tiles can be repaired or replaced without draining the pool entirely. You’ll need to use marine epoxy to do this and may require a snorkel or breathing tube.
Let’s face it, if it’s just a few tiles, it hardly seems worth draining the pool. It’s time-consuming and expensive. When you drain, you’re paying for the water to refill the pool in addition to the start-up chemicals you’ll need to add when you refill.
How Do You Replace Pool Tiles Without Draining?
Replacing pool tiles without draining requires special adhesives that are designed to set underwater. A marine epoxy will work.
Marine epoxy is designed for boats and other wet environments. It’s a good option for sticking pool tiles.
Depending on where the tiles are, you’ll also either need to hold your breath or use a snorkel or breathing hose along with some swimming goggles.
If the tile is near the pool’s surface, you can drain a few inches below the broken tile. There’s no need to drain the entire pool.
Related Reading: Should You Drain Pool Below Skimmer or Return Jets?
Adhesives & Cement for Pool Tile Repairs
When it comes to fixing pool tiles that have fallen off, you’ll need to use a specific tile adhesive or mortar that can be submerged and hold up to the water pressure. You have a few choices.
Some glues and cement are for quick tile repairs, whilst others will be more permanent.
Here’s what you can use:
- Pool tile cement (thin-set or mortar) – this is a long-lasting solution. The pool needs to be drained below the tile you wish to repair. It’s best suited if you have a number of tiles to stick back on, rather than just a few tiles. You can also use a thin set to fill up small cracks behind the tiles.
- Marine or Pool Epoxy Putty – Used for marine repairs, this epoxy is great for quick dry and underwater repairs. If you have pool tiles underwater, use this. It’s simple to apply and will provide a long-lasting finish. It’s also good for filling cracks in the pool’s surface or sealing leaking skimmers.
- Silicon – for a super quick repair that can last from a year or two to five years or more, you can use good old silicon. It’s cheap and very quick to apply. It lasts surprisingly well.
Boss Silicon

- Quick tile repair
- Lasts for 2 to 5 years
- Cheap
For a quick and dirty tile repair, you really can’t go past silicon. Simply squeeze it onto the back of the tile and stick it in place. You’ll need the area to be dry for this to stick properly. You could get more than 5 years out of this repair.
Pool Plaster (EZ Patch 1FS)
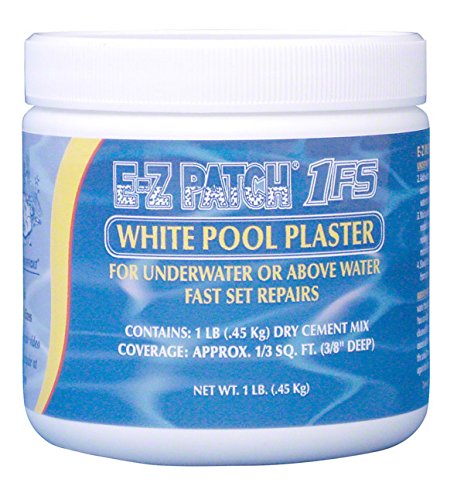
- Specifically designed for repairing pool tiles
- Fast setting
- For underwater or above water
This product is specifically designed for repairing pool tiles. You’ll need to drain the pool below the tile you wish to repair to use this product. Make sure the area is properly dried and prepared too. It’s a fast setting, allowing you to refill the pool the next day.
Jenolite Underwater Epoxy Putty
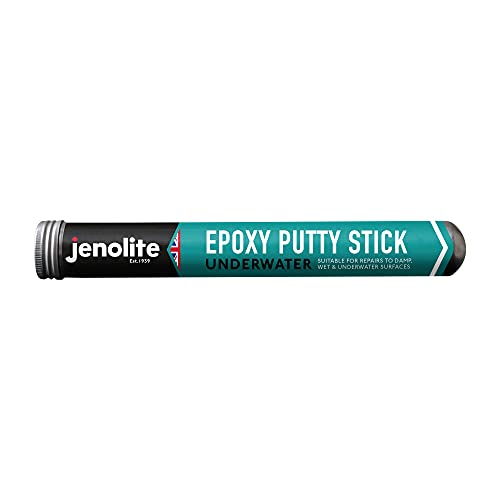
- Waterproof epoxy repair
- Easy to mold to shape
- Multi-surface use
For underwater pool tile repairs (or above water), this underwater marine epoxy stick will do the job. To use it, you just need to break off a small section and work the putty into a pliable form. Then stick it on the back of the tile and hold it in place for a minute or so. It is completely dried and cured in 60 minutes.
Grout for Pool Tiles

When you replace your pool tile, you’ll need to regrout the tiles you have replaced. There are two types of grout that are generally used for swimming pool tiles:
- Cement based
- Epoxy
Can you use ordinary cement-based grout in a swimming pool?
The best grout for swimming pool tiles is waterproof. Cement-based grout is not. It’s porous. It also stains and can crumble.
Cement-Based Pool Tile Grout
Cement-based pool tile grouts are cheaper and have been used for many years. They are susceptible to algae and get dirty. Cleaning algae out of the grout isn’t fun. A better choice is epoxy tile grout. But if you do want the cheaper option, check out this product here:
Polyblend Sanded Tile Grout

- Accommodates joints for interior or exterior installations
- Use for different surfaces
- For residential to extra heavy commercial use
Epoxy Pool Tile Grout
Unlike cement-based tile grouts, epoxy grout will not have any mold or algae issues. Epoxy grout is the best choice for longevity. It’s waterproof and resistant to chemicals and stains.
NADAMOO Epoxy Grout

- Easy to apply
- Long-lasting and doesn't discolor
- Made from epoxy resins
Step By Step: How to Replace Pool Tiles
Like any worthwhile home improvement project, the process of replacing pool tiles starts at the hardware store. So that’s where we’ll start as well.
Materials & Tools Needed
Here’s everything you will need to replace a broken pool tile, aside from the actual tiles.
- Small bucket/bowl for mixing
- Shop towel or sponge
- Grout removal tool
- Hammer
- Chisel
- Trowel
- Duct tape
- Rough brush for scrubbing
- Adhesive (Cement or epoxy-based thin-set mortar, marine putty, or silicon)
- Waterproof grout
Step 1) Drain the Pool (Optional)
If you have more than a few tiles or aren’t going to use marine epoxy to stick your tiles on, you’ll need to drain the pool below the tile you wish to repair. If you usually close your pool for winter, it might be a good idea to do it then.
To drain below the skimmer, toss a submersible pump in and let it drain to about six inches below the tiles you’re replacing.
Let everything dry out.
Step 2) Remove Tiles and Prepare The Surface
If the tiles are cracked or loose, you’ll need to remove them completely. If the tile has already fallen off, check the surrounding area for other loose tiles and remove them too. Here’s how…
Removing the Grout
To remove a tile from your pool, start by removing the grout around the outside of the tile. You have two tool options to remove the grout:
- Hand Grout Removal Tool (or a screwdriver)
- Electric Tool (vibrating tool or reciprocating saw)
The exact procedure depends on the tool you’re using. Either way, you need to scrape between the tiles with your grout removal tool of choice.

Removing Loose Tiles
After you get rid of all the surrounding grout, grab your hammer and chisel. If the gap between the tiles is too thin to comfortably use a chisel, try a large flat-head screwdriver.
Instead of trying to remove a tile in one swift hit, give the chisel a few gentle taps. This will decrease the risk of cracking the tile. You want to reuse the tile if you can.
Examine the Foundation
Depending on how long a tile has been cracked or loose, the cement behind it may also be damaged. The most obvious issues to look for are missing chunks, chipped seams, and cracks in the pool’s wall, no matter how small.
Use a chisel or screwdriver to scrape off loose cement and even out the surface a little. Then fill in any cracks in the pool’s surface (behind the tile).
Small cracks can be filled with cement tile adhesive or epoxy. Large cracks longer than a few inches may indicate structural issues. You may want to get in a pool pro if you’re not sure.
Step 3) Finding Matching Pool Tiles
You’d think the fact that most pools are blue and white would make shopping for replacements easy. But, there are loads of choices and if your pool is old, it can be challenging to find a matching tile.
If you are having trouble finding the right option for your pool, here are some tips to try before settling for off-shade knock-offs.
- Check around the house
Before you even step foot in a hardware store, take a good look inside your garage or storage area. You may have a few of your original tiles left over from the original installation. - Reach out to your contractor
Try to find the contact person for the company that did your pool in the first place. Even if they don’t have enough extras on hand, they may be able to tell you the exact color iteration. And if it turns out your original tile is discontinued, send them some pictures and ask for a recommendation to match your color tones. - Utilize web tools
It’s always best to see the colors live and feel the texture. However, your local store is not likely to carry a large enough selection of colors and patterns. You’ll have much better luck browsing their online counterparts. You can search for specific color shades, browse Amazon, or even Google an image of your tile to find a perfect match. - Consider custom tiling
For most of us, the added cost of ordering custom-made tiles is a deal breaker. But if you’re a perfectionist who has exhausted all options of finding your original tiling, it may be worth considering this as an option. - Remove a tile
If you can’t find the right tile, you can remove one from a less visible area of the pool. Somewhere that is less noticeable.
Step 4) How to Glue Pool Tiles
Before you even get your tools ready, check out the forecast. If there’s even a small chance of rain, it might be a good idea to postpone attaching new tiles.
The method here will depend on the tile adhesive you choose to use. Here’s a quick rundown.
Pro Tip: Be careful your tiles are straight. Once the glue has set, you can’t move them without breaking the glue off.
Silicon Adhesive
This is by far the easiest way to reattach a pool tile and requires almost no preparation. Remember, this is not suitable for sticking tiles underwater.
To reattach your pool tile with silicon, just squeeze a generous amount of silicon onto the back of the tile. Now stick the tile in place. It will hold instantly. Wipe off any excess silicon. You can use mineral turps to help remove the excess on the surrounding tiles.
Marine Epoxy Putty Adhesive (Underwater Tile Repairs)
The next easiest adhesive is marine epoxy sticks. To use, cut or twist off a small amount of the epoxy. Knead it in your hands until it is uniform in color. Now firmly apply it to the back of the tile. After you’ve done this, push the tile firmly in place. Hold it for a minute or so.
This option is suitable for underwater pool tile repair.
Cement-Based Tile Adhesive
The exact instructions will depend on the product. Usually, you’ll need to mix in a cement bonder additive first. Then mix the cement with a little water to form a thick paste.
Now you can apply it to the surface of the pool (for a large area) or the tile (if you only have one or two tiles). It should be about 1/4″ thick. Usually, you use a tile trowel. The cement should have uneven rows or “trenches” in it.
Now stick the tile in. If the mix isn’t the right consistency, the tile will not stick properly.
With all methods, during the first couple of hours, it’s best to check in every 20-30 minutes to make sure the tiles have stayed in position.
Step 5) How to Apply Pool Tile Grout
The last step of the process starts with high-quality waterproof grout. Use epoxy grout if you have the budget. If there’s one item that’s worth overpaying for, this is it.
You only need a small amount to do the job. But if the grout isn’t filling your tiling properly, you might end up with a leak that can threaten the structural integrity of the entire pool area.
When it comes to applying grout, be generous. Apply it around each tile you have fixed. The goal here is to make sure the space between the tiles is totally filled in.
Related Reading: Can You Paint Pool Tiles that Get Wet? (answered!)
Tools to Remove Grout from Pool Tiles
To remove grout from pool tiles, you can use a few different tools:
- Screwdriver
- Grout removal tool (hand tool)
- Vibrating tool
- Reciprocating Saw

- Provides low-vibration operation
- Fits into hard-to-reach spaces
- Exclusive angled body design
For larger projects, use a vibrating tool or a reciprocating tool to remove the tile grout. This tool will quickly remove old grout.
M-D Building Products Heavy Duty Saw

- Easily remove grout
- Long lasting diamond cutting blades
- Ergonomic comfortable handle
For small jobs and for those underwater repairs, a screwdriver or a grout removal tool is best. This saw costs less than $15. Sure, it’ll take more time to remove grout by hand, but the result will look the same.
Is It Better to Retile a Pool? What’s the Cost?
If you have an old pool, you may be wondering if it’s better to re-tile the pool or not.
Depending on the size of your pool, a full re-tiling can cost anywhere from $15K to $70K. But with the right know-how and a bit of elbow grease, you can get the job done for a tiny fraction of that price.
In addition to the retiling cost, it’s also a big renovation. The pool will need to be completely drained. You may need new fittings (like lights, jets, etc.) too.
The plus side is your pool will look brand new.
Related Reading:
Limestone VS Travertine For Pool Decks And Coping
The Easiest Ways to Remove Calcium Deposits from Pool Tiles